Decline Applications
Applications can be declined if they do not meet your program requirements and you do not intend to fund them. Declining an application is final and cannot be undone.
Tip: A program can be configured so that applications will be automatically declined if the assigned budget does not have enough funds to cover the amount requested. Learn more.
-
Navigate to the Applications area.
-
In the Applications tab, take either of the following actions.
-
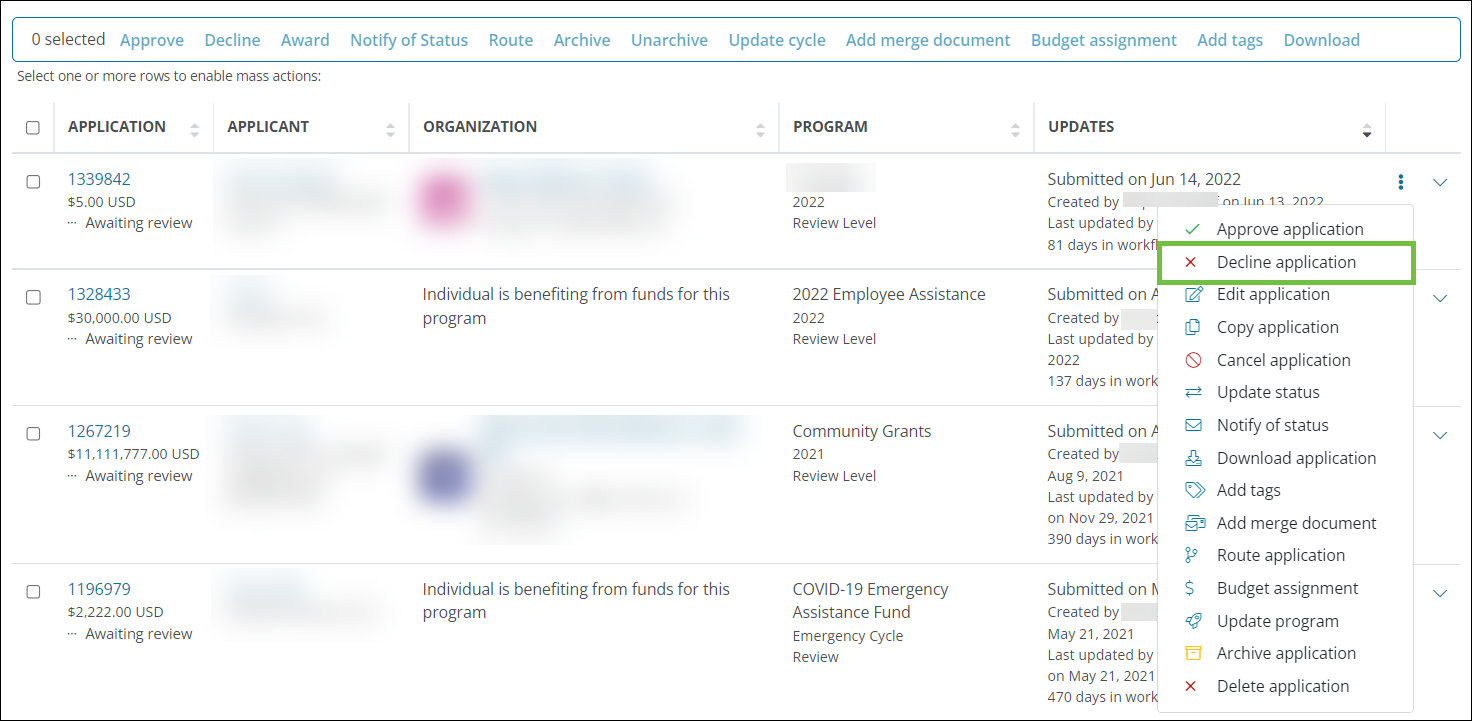
Option 1 - Click on the ellipsis icon next to the application and then Decline application.

-
Option 2 - Select the checkbox next to the applications and then click on Decline in the toolbar.
Note: This option is beneficial if you want to decline multiple applications at once. All applications selected must be in the same program.

-
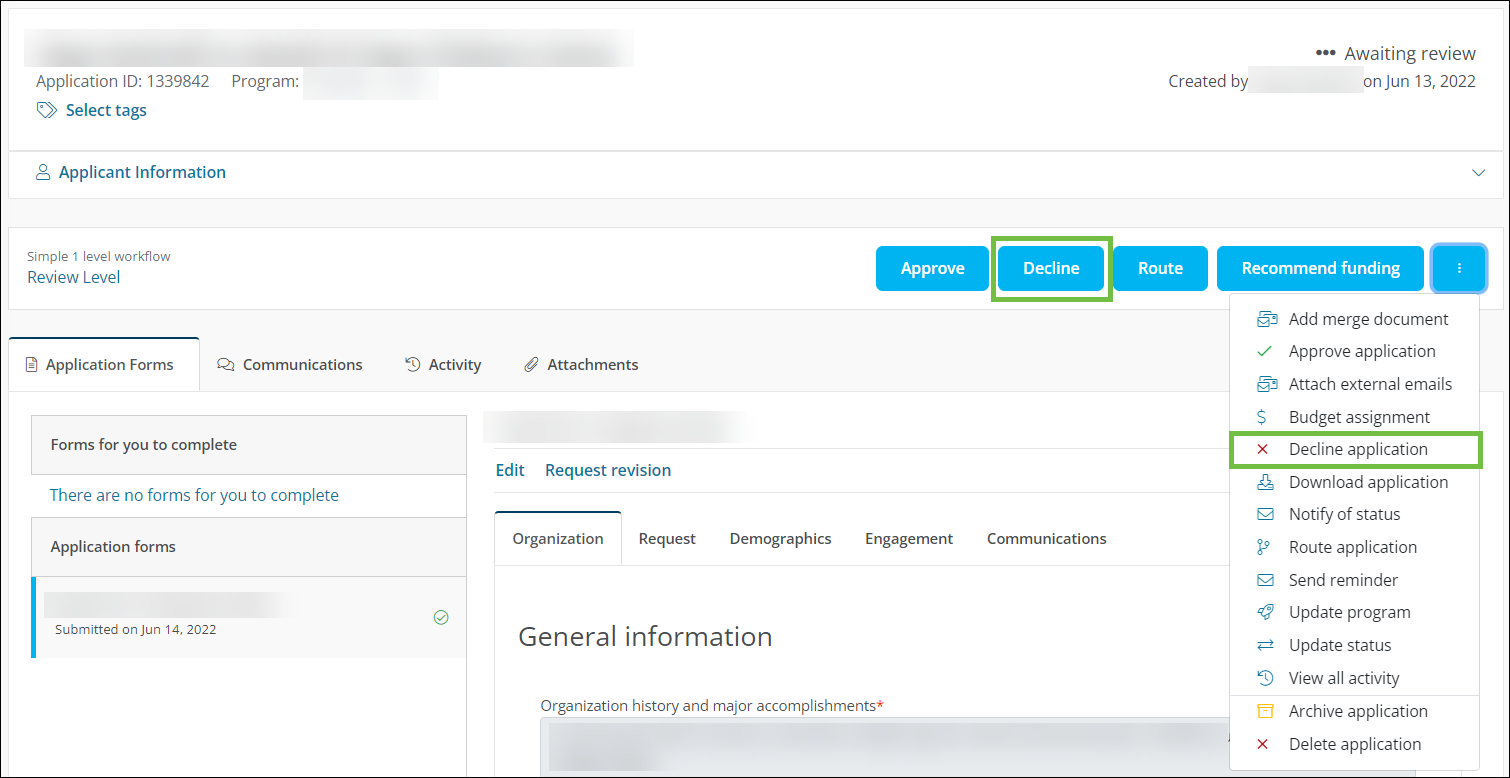
Option 3 - Click on the Application ID to open the Application View. Click on Decline or on the ellipsis icon next to the workflow level and then Decline application.

-
-
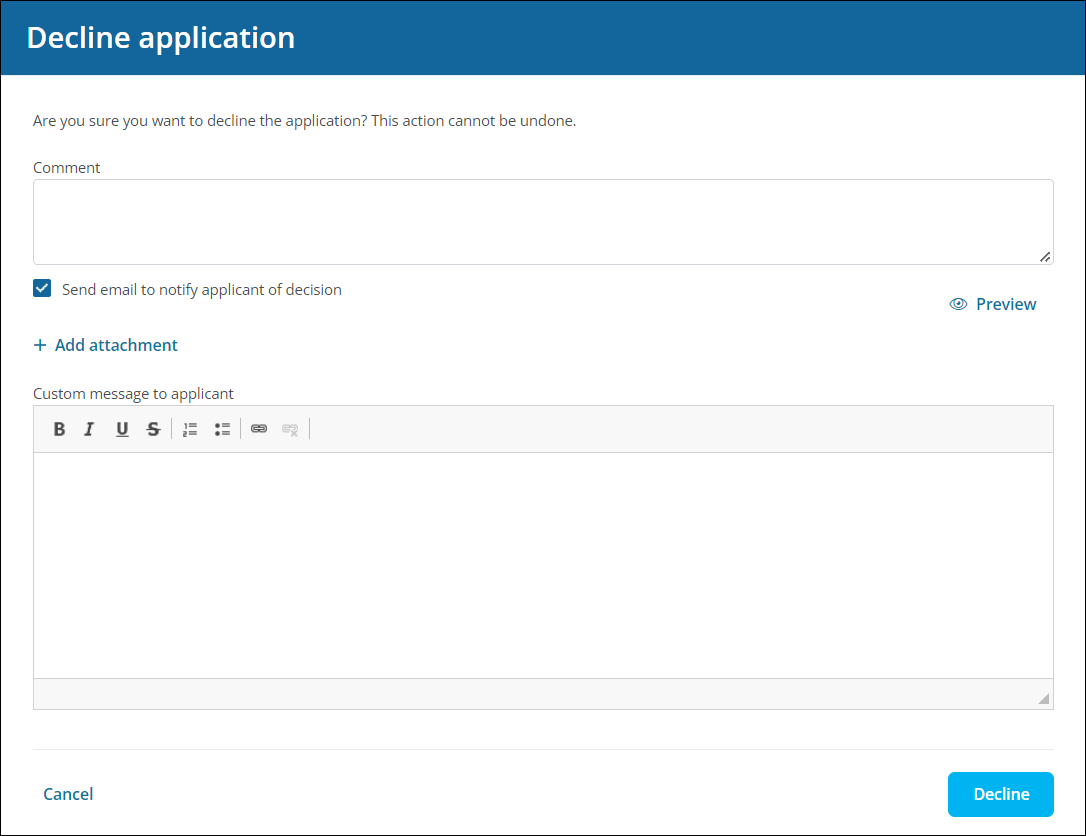
In the Decline Application screen, take the following actions.
-
Provide a comment that will be saved to the application's activity.
-
Enable the Send email to notify applicant of decision option.
Note: Applicants will receive the GC-14 Your Application is Declined - ID: {{APPLICATION_ID}} email. You can preview the email in the screen by clicking on Preview.
-
Optional - Add any attachments.
-
Optional - Provide a custom message to include in the email to the applicant.
Warning: Keep in mind that if you have chosen to decline applications in bulk, this message and any attachments will be sent to all applicants selected.

-
-
Click on Decline to finalize the action.
Once complete, the status of the application will change to Declined.
Note: Declining an application is the end of that application's lifecycle. At this point, you can choose to archive it to remove it from reporting, dashboards, etc. Learn more.