Create the UI Model for a Constituent Tile
This material pertains to version 4.0 of Blackbaud CRM SDK.
The second step to create custom tiles for the Constituent page’s summary is to create a UI Model for the view data form. For the most part, you create the UI Model just like a UI Model for any other view data form, although you can use some style options that are specific to tiles.
Create the UI Model
If you do not already have a UI Model project in your solution, you need to create one. For information about how to create a UI Model project, see Create a UI Model Project.
With the UI Model project in place, you can create a UI Model for your view data form. For information about how to create a UI Model, see Create a UI Model for a View Data Form.
Update the UI Model
After you create the UI Model, you can edit it as necessary.
-
To specify logic about the content to display in the tile, edit the VB file.
Warning: Do not edit the CodeGen.vb files in the UI model.
-
To modify the appearance of the tile, edit the HTML file and create JavaScript files as necessary. Several tile-specific CSS classes and helpers are used in out-of-the-box tiles, and they are available for custom tiles. For information about these styles, see CSS Classes for Constituent Tiles.
Reload the View Form Spec and Build the UI Model Project
When you create a UI Model, the UI Model Wizard automatically updates the view data form spec to insert the WebUIComponent element and references to the UI Model. To include these changes on the form, reload the view data form spec with the LoadSpec utility or re-deploy its package.
After you reload the view data form spec and finish your changes to the UI Model, build the UI Model project. We recommend that you place the project's DLL in your installation directory's bbappfx\vroot\bin\custom folder and that you place the HTML file and any JavaScript files in your installation directory's bbappfx\vroot\browser\htmlforms\custom folder.
With the UI Model project in place, the next step to create a tile is to insert a row for the view form in the CONSTITUENTSUMMARYAVAILABLETILE table to designate it as a tile.
After your tile's view data form and its UI Model are in place, users can customize the Constituent page summary to display your custom tile.
Tip: Before users can display a custom tile in Blackbaud CRM 4.0 Service Pack 3 or earlier, you must manually insert a row for the view form in the CONSTITUENTSUMMARYAVAILABLETILE table to designate the form as a tile.
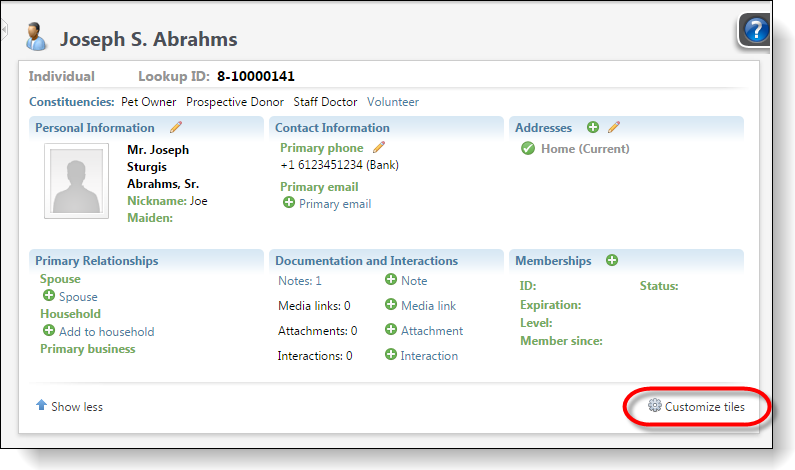
Within the summary on the Constituent page, users click Customize tiles to modify the tiles that appear in the summary.
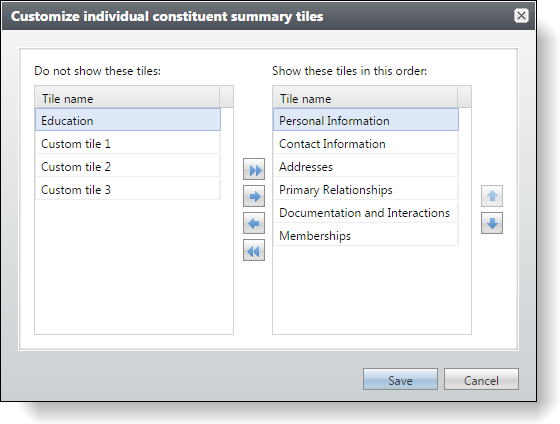
Then on the Customize constituent summary tiles screen, users can add your custom tile to the list of tiles that the summary displays.
Tip: Keep in mind that for end users to view the tile, they must be in system roles with permission to view the feature. For information about how to grant permissions to system roles based on the security folder you specify on the view data form, see the Security Guide at Blackbaud CRM User Guides.