Checkout in Personal Fundraising
To configure an existing personal fundraiser to use checkout, select a donation form in a campaign that is configured for new checkout in the Edit Campaign Details section.
To configure new personal fundraisers to use checkout, select a checkout-enabled merchant account in the personal fundraising campaign configuration.
After the update, the checkout modal will appear for payment processing.
Edit an existing Personal Fundraising for checkout
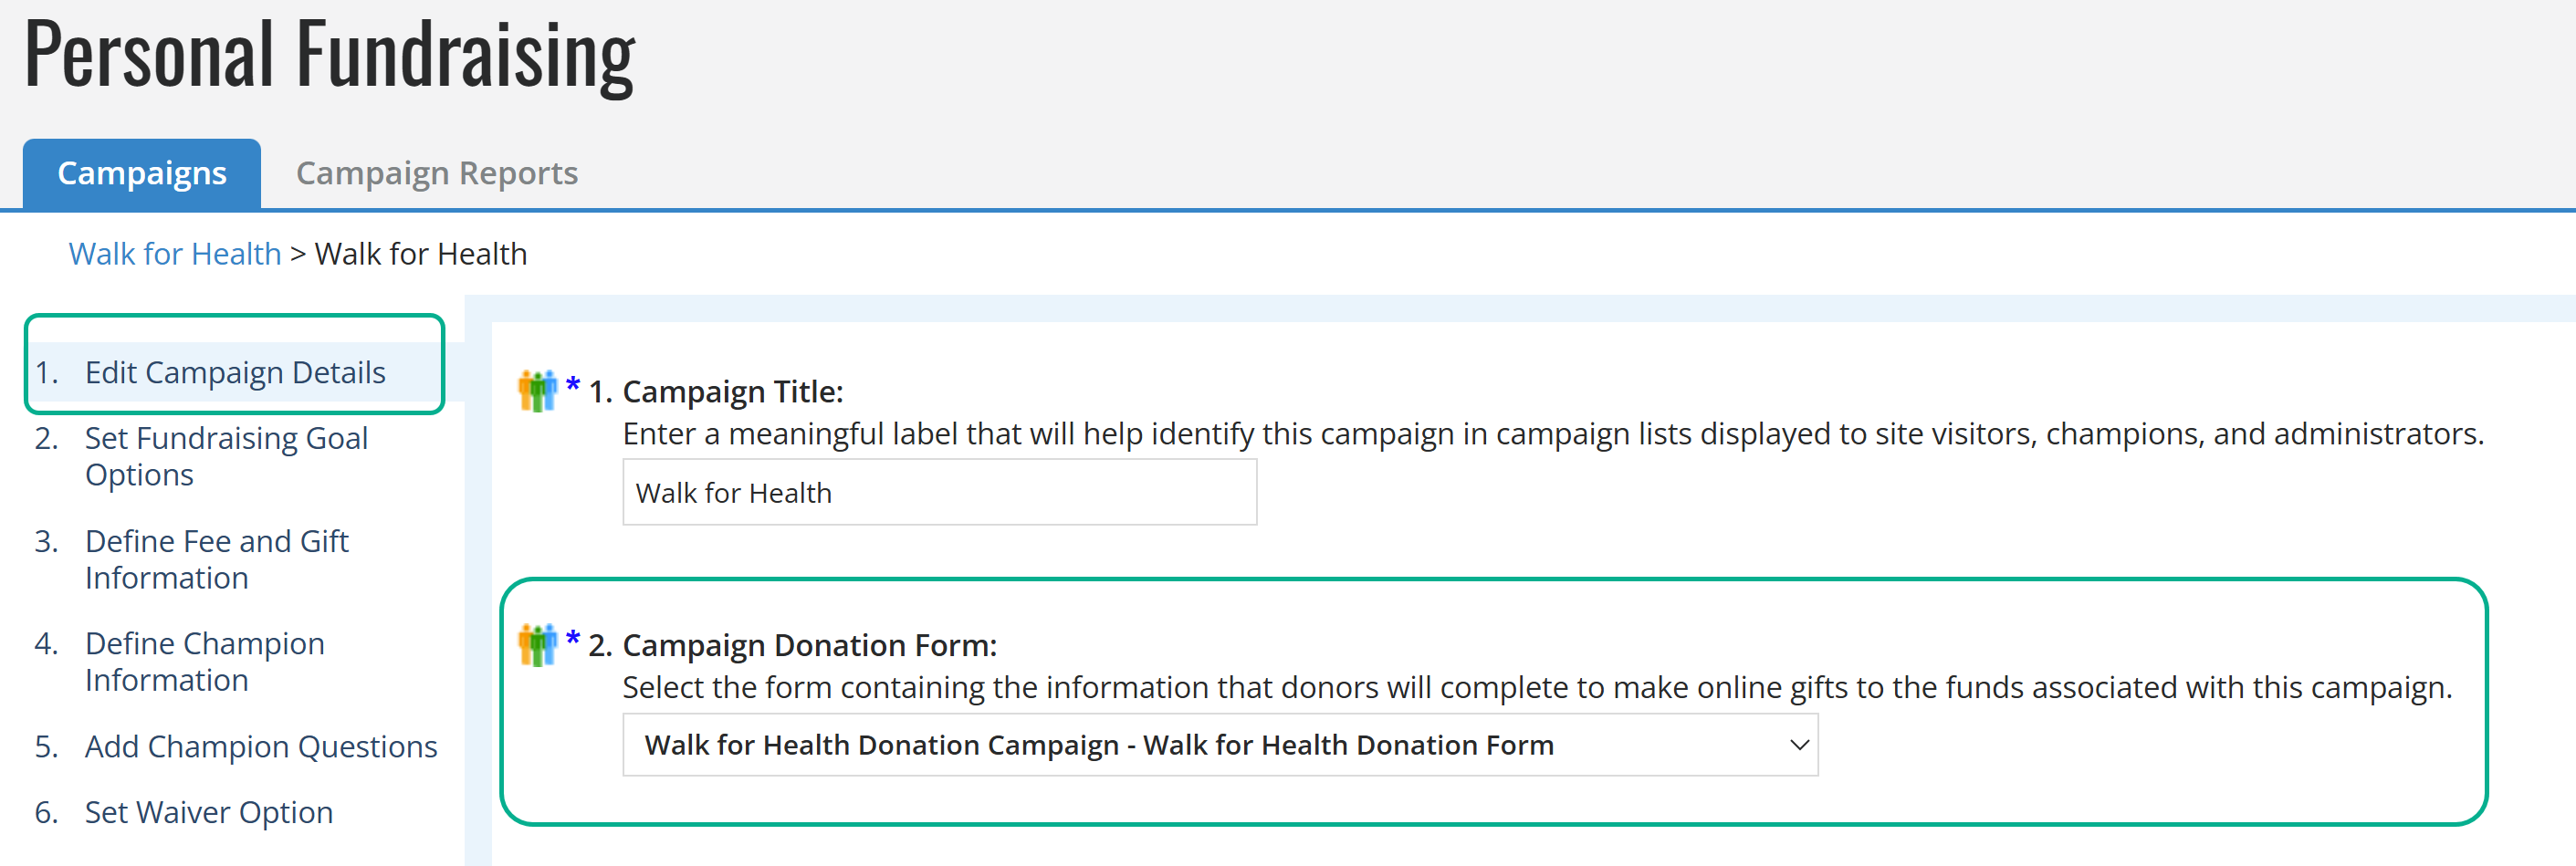
Go to Fundraising, Personal Fundraising.
Select Edit for the personal fundraiser.
From the Campaign Donation Form drop-down list, select a donation form that is associated with a campaign enabled for checkout, and then select Save. The new donation form collects money for this campaign.
Tip: You can search for an account and scroll through the results within the dropdown for the Merchant Account field.
Select Save.
Create a new Personal Fundraiser with checkout
From the navigation bar, select Fundraising, Personal Fundraising.
Select Create a Personal Fundraising Campaign.
Complete the fields as described in Create a Campaign with Minimum Setup.
For Campaign Merchant Account, select a checkout account into which to deposit all money collected by the funds associated with this campaign. You can only select from accounts in the categories for which you have permissions.

Tip: You can search for an account and scroll through the results within the dropdown for the Merchant Account field.
Complete the remaining steps as described in Create a Campaign with Minimum Setup.
Select Finish.