Create a TeamRaiser Participant Center
Create a Participant Center using the steps below, then associate the Participant Center with a TeamRaiser event. To allow participants to customize their home page with conditional content, suggested messages, photos, and more, set the TeamRaiser to allow participants to edit the Participant Center .
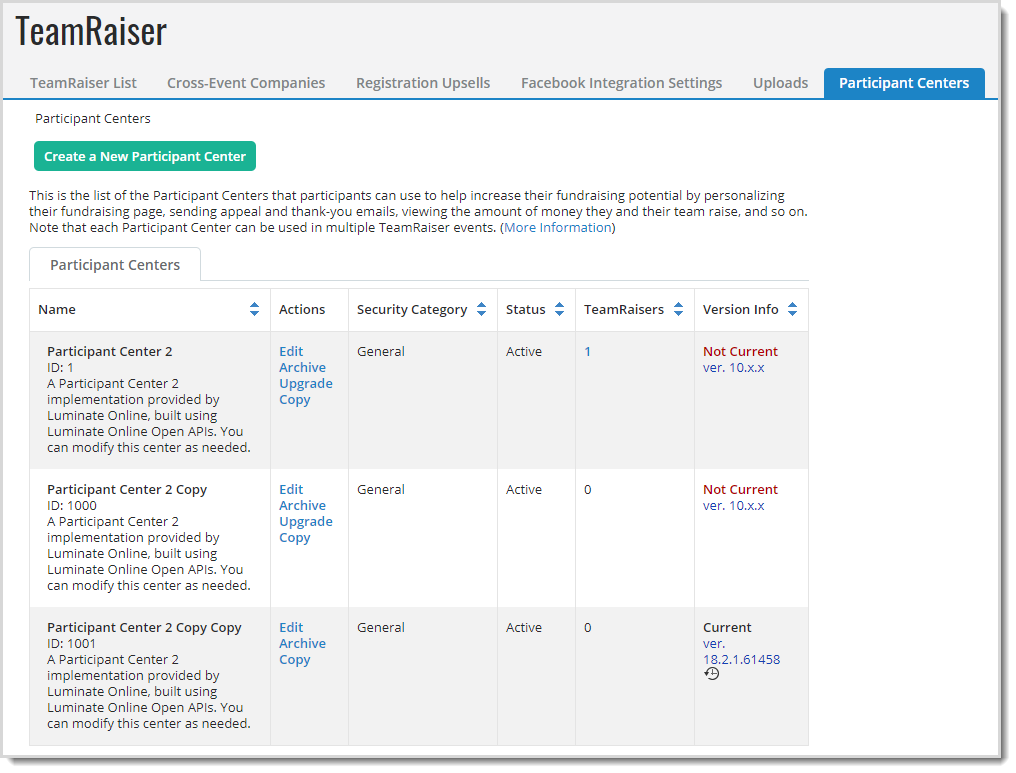
Participant Center FAQs
 Can I override Participant Center options?
Yes, you can override Participant Center options at the event level when you select to associate the Participant Center with the TeamRaiser event. See Advanced Event Options.
Can I use custom styling or JavaScript?Yes, you can access and edit custom style sheets and JavaScript files through the Participant Centers tab.
Can I have more than one style of Participant Center?You can have multiple instances of Participant Centers through the administrator interface.
Create a Participant Center 3
Note: If you haven't yet, set your Open Luminate Online API key so you can create and manage a Participant Center.
Go to Fundraising > TeamRaiser and select the Participant Centers tab.
Select Create a New Participant Center.
In Identify Participant Center:
Give the Participant Center an Administrative Name and Description.
In Name for Public Folder on FTP server, type a folder name using only letters and numbers (Such as, WalkForHealth2019). The folder stores the Participant Center files on a secure FTP server.
Note: Unless the Participant Center is embedded in a Page Wrapper, the folder name displays in the Participant Center URL to participants. The name can contain letters, numbers, and underscores. Once saved, the name cannot change.
Choose a Security Category to determine who can edit this Participant Center.
Select Next.
(Optional) In Configure Options, optionally update any of the following options:
Participant Center Home Page - Either keep the default, select Select to choose a custom page, or enter the URL of a page you created.
Page to Display After Participant Logout - Either keep the default, select Select to choose a custom page, or enter the URL of a page you created
Progress Meter to use - Either:
Leave Default selected to use the default Simple Progress Bar.
-- OR--
Select More, and choose an option from the Progress Meters.
Tip: Once selected, progress meters display in the drop-down list. Repeat the step above to add more progress meters to the list so you can preview options before choosing the appropriate meter. The Clear button removes selections from the drop-down list. If you use the Clear button, refresh your page to add the Default option back into the drop-down list.
Tip: The Progress Meter displays on the default home, participant, and team fundraising progress pages to show money raised toward a goal.
Suggestion Box - Display Update Personal Page Suggestion - Enter the number of days to wait before displaying a suggestion again after a participant updates his or her page.
Suggestion Box - Display Send Email Suggestion - Enter the number of days to wait before displaying this suggestion again after a participant sends email messages to contacts.
Suggestion Box - Display Update Goal Suggestion - Enter the percentage of a goal that a participant must reach before displaying this suggestion.
Suggestion Box - Display Add Contacts to Address Book Suggestion - Enter the number of contacts that a participant must have in the Address Book to remove this displayed suggestion.
Personal Page Layout 2-Photo Option - Select the checkbox to offer the layout option that allows a participant to upload two photos for display on their personal fundraising page.
Note: Events that use this Participant Center should set their default Personal Page to use a layout that includes two photos or configure it to allow participants to change their layout as defined by their site option or specific Advanced Event Option.
If social sharing is enabled on your site, optionally configure these settings:
Social Sharing Post Link-Back Link Title Override (Facebook, LinkedIn only) - To replace the default post title defined during Social Media configuration to display on posts made from your site, enter the text to display as a post title made by a participant from this Participant Center. (This is the link to the Personal Page of the participant by default)
Social Sharing Post Description Override (Facebook, Yahoo! only) - To replace the description statement defined during Social Media configuration to display on posts made from your site, enter the text to display on a post made by a participant from this Participant Center.
Social Sharing Post Action Link Title Override - To replace the action link label defined during Social Media configuration to display on posts made from your site, enter the text to display as the label for the action link that displays on a Facebook or LinkedIn post made by a participant from their Participant Center. Note that you can template this link title to include appropriate session tags (S-Tags) to personalize or customize this text.
Social Sharing Component Type for Reporting - To replace the component type defined during Social Media configuration for identifying the specific set of social posts in the Social Media Counts by Component Type Interactions Report, enter the name of the component type (such as the name of the TeamRaiser event and the month of dates you want to report on, such as FunRunFeb).
Select Next.
(Optional) On the Participant Center Wrapper page, use the content editor to add branding or text in the content editor to display images or text in the horizontal space between the Welcome bar and the tabs on every page of this Participant Center.
Note: If you inserted the Participant Center in a custom page and plan to use that page to embed a participant center, the Page Wrapper displays instead of the page wrapper editor.
Select Preview to view how the Participant Center Wrapper looks with the Participant Center Home Page.
Select Finish.
Next, Associate a Participant Center with a TeamRaiser event. You can also Edit a TeamRaiser Participant Center