Add Gifts
This tutorial helps you add gifts in the web view with minimal effort. The types of gifts you can add are:
-
One-time
-
Recurring
-
Gift-in-kind
-
Stock/property
-
Pledge
-
Other
For detailed information about all the available gift types, see Gift Types. For information about how to enter a batch of gifts, see Gifts Overview.
Note: To add credit and debit card payments, payment processing must be set up. For more information, see Get Started with Payment Processing.
Add gift
Depending on your workflow, you can add a single gift from:
-
Navigation, New, Gift
-
Gifts, Overview, Add, Add single gift
-
A constituent record, Giving history, Add gift
Add gift details
The details you add vary based on how you navigate to enter the gift, the type of gift you select, and the payment method. For example, when you add a gift from Home, you must find the constituent giving the gift.
-
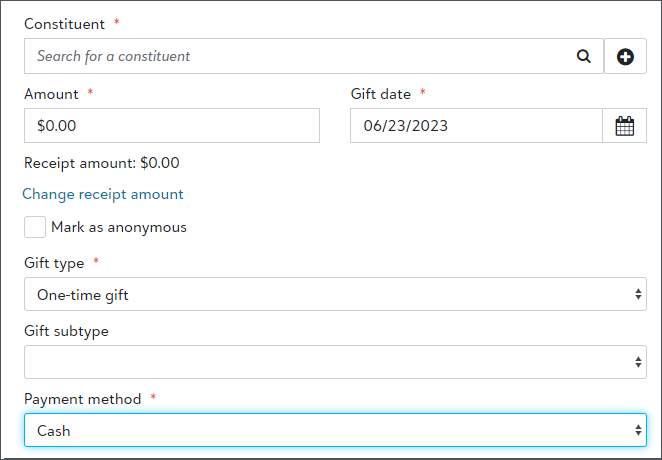
In the Constituent field, search for the individual or organization who gave the gift. For a gift from a new constituent, select Add
-
In the Amount and Gift date fields, enter how much the donor gave and when.
-
In the Gift type field, choose whether the gift is one-time, recurring, gift-in-kind, stock/property, pledge, or other. For more information, see Gift Types.

For recurring gifts, the schedule defaults to a monthly frequency starting on today's date. To make changes or to add an end date for the gift, select Edit schedule. For more information, see Recurring Gift Schedule.
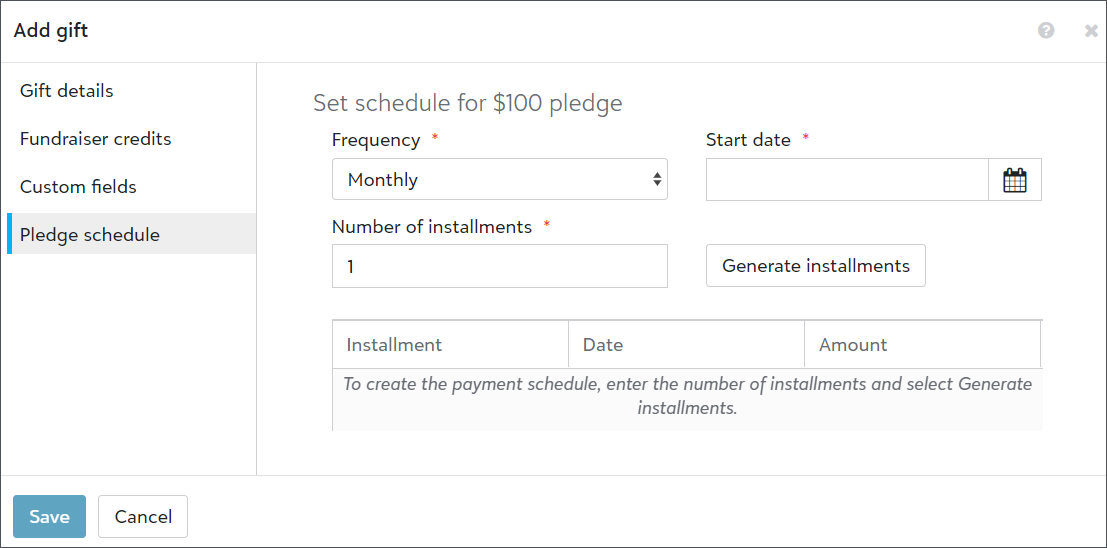
For pledges, the schedule defaults to a monthly frequency starting on today's date. To change the date, frequency, and generate installments select Pledge schedule. For more information, see Pledge Schedule.
Note: By default, the frequency is Monthly and the number of installments is 1.

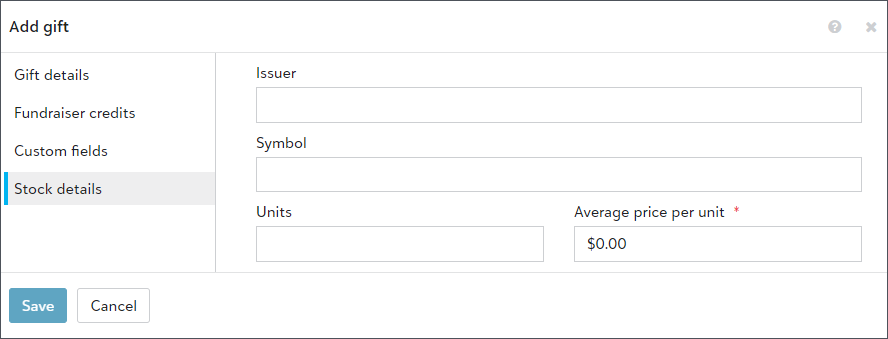
For stock/property gifts, select Stock details to enter details such as the issuer and average price per unit. For more information, see Stock/Property Gifts.

Add payment method
In the Payment method field, choose how the donor paid. When you choose credit card or direct debit, you also choose a payment configuration in the Process with field. A payment configuration includes information about the gateway, access credentials, fraud protection options, currencies, and credit card types that your processor supports.
Note: Stock/property and pledges do not have a payment method.
Note: You can record gifts with a payment method of PayPal or Venmo, but they do not process through Blackbaud Checkout.
 Enter credit card payments
To record and process a credit card payment:
-
Select Credit card in the Payment method field.
-
In the Process with field, select the payment configuration to process the payment through one of the gateways Blackbaud Payment Service supports, such as Blackbaud Merchant Services.
-
If the card is physically present and payments process through Blackbaud Checkout, select Card is present.
Note: When you add a recurring gift in the web view, Card is present appears if the gift's start date is today or you select Process additional payment now.
-
Select the Credit or debit card field, and complete the transaction through Blackbaud Checkout.
-
If the card is physically present, swipe the credit card through a USB card reader.
-
If the card isn't present, such as when a donor provides their card information by phone, enter the card details and select Finish and pay to authorize the payment.
-
For more information about how to accept and process credit cards as you add gifts in the web view, see Get Started with Payment Processing.
Tip: When you add a gift by credit card in the web view, you can save its card details. To track the authorization code or EFT status, edit the gift in the database view.
 Enter direct debit payments
To record and process a direct debit payment, such as when a donor provides their bank account information:
-
When you add the gift in the web view, select Direct debit in the Payment method field.
-
In the Process with field, select the payment configuration to process the payment through Blackbaud Merchant Services.
-
Tip: If there are no payment configurations available, an admin should check settings and credentials in the database view. For more information, see Payment Configuration Troubleshooting.
-
Select the Account details field, and enter the account details and check number in Blackbaud Checkout.
-
Select Finish and pay to authorize the payment.
For more information about how to accept and process direct debit payments as you add gifts in the web view, see Get Started with Payment Processing.
Tip: When you add a gift by direct debit in the web view, you can save its account details. To track the bank, reference details, or other information, edit the gift in the database view.
Add fund
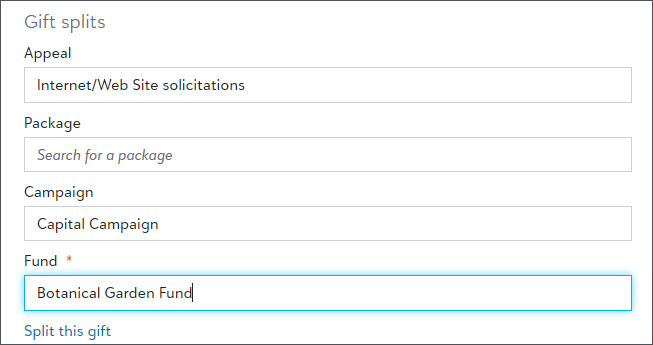
Under Gift splits, in the Fund field, choose the donor's intent for how you should use, such as toward a specific cause or financial purpose.
If the donor requested that you use their gift for more than one fundraising initiative, select Split this gift and indicate how much for fund.

Save gift and process payment
After entering the required gift information, select Save to record the gift. If it is paid as a credit card or direct debit, the payment will process.
To find the gifts you add in the web view go to:
-
a constituent record, under Giving history
-
a gift list, in Lists, Gifts, Gift lists