Thank You Email for Online Giving Forms
The Thank you email is automatically sent to supporters after they submit an Online Giving form. The information they contain depend on which the type of form, how you set up the form, and changes you make to email.
Important: Thank you emails can't be resent. If a supporter doesn't receive the email, you can send a message outside of Raiser's Edge NXT.
Tip: If you use gift receipting in Raiser's Edge NXT, you can enable emailed receipts through a donation form.
If you change the default content of the email, consider these recommendations:
-
Focus the content on the details of the submission.
-
Thank the person for their interest in your mission.
-
Offer the person ways to keep in touch, such as links to receive additional information.
-
Suggest other ways to get involved.
Change Default Email Message
To change a form's default email message, from Online Giving, select Donation forms
-
Create a new form or edit an existing one.
-
From Confirmations, under Thank you email, select Open email designer.
-
Hover over the message, and select Edit.
-
In the text editor, make changes to the message.
-
To make personalized changes, select Merge and choose the fields you want to add.
-
After making your changes, select Apply.
-
Continue to edit the form or save it.
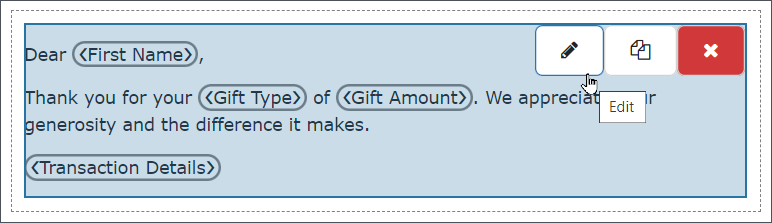
Example of a donation form thank you email.
Add Merge Fields
Merge fields allow you to personalize the content of the message. By default, there are merge fields in the message.
Select where you want a merge field in the message, then select Merge and the field you want to add.
Note: If you add a title or suffix for a form, Title and Suffix are available as merge fields.
Warning: Don't remove the Transaction details merge field. It provides details about the payment.
Add Columns
The layout of an email message is made up of columns. To change the layout, select Columns and move additional column where you want them to appear.To
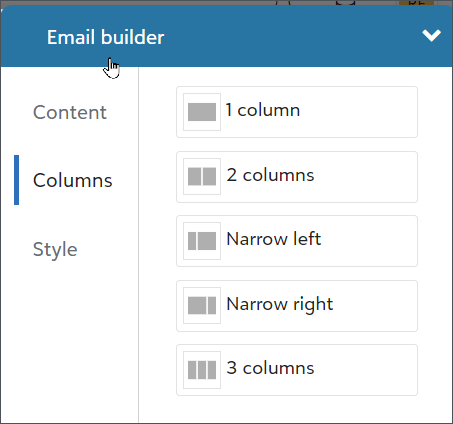
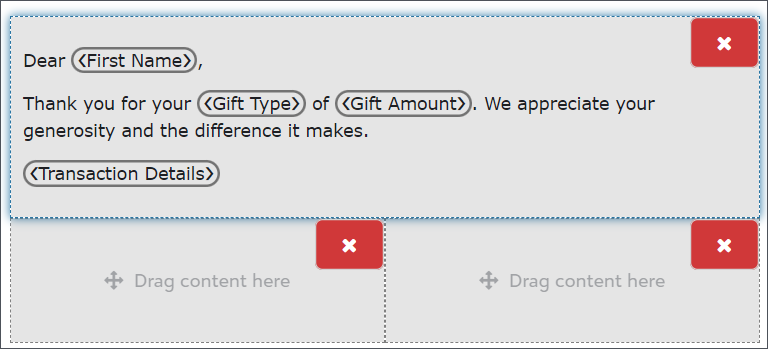
Each set of columns adds a new row to the layout. For example, if you select 2 columns, they appear together horizontally in the layout.
Add Content
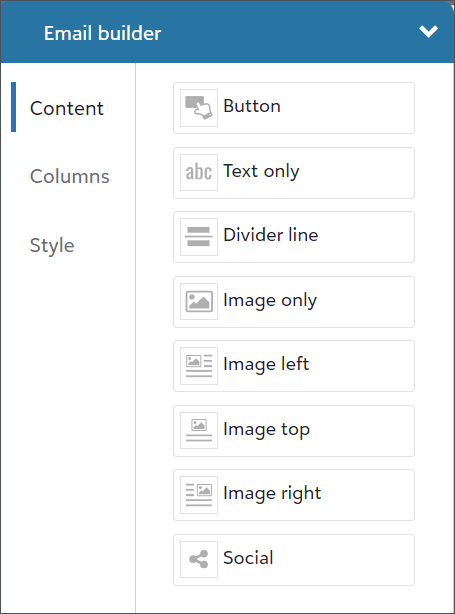
To move different types of content to the layout and refine your message, select Content from the Email Builder.
 Button
To add a button that is a hyperlink to a URL:
-
Move Button to the layout.
-
Enter the button's URL.
-
Enter the text that displays on the button.
-
Style the button, by changing it's:
-
button color
-
text color
-
font, text size, and style
-
corners to shadow and rounded
-
-
Select Apply.
Text only
To add text, move Text only to the layout. Use the editor to compose your message, then select Apply.
To personalize the message, such as adding the recipient's first name, select the location for the personalization in the text edit. Next, select Merge and the field.
Divider line
You can use divider lines to separate sections of your email and add visual appeal.
To add a one, move Divider line to the layout, set its style and select Apply.
Image
To add an image to your message, move Image only, Image left, Image right, or Image top to the layout and choose the image to use.
To add text around an image, select Image left, Image right, or Image top. After inserting the image, under Text options, you can add the text and change the alignment of it around the image.
Note: You can add new images to the library or search for existing files. Images files can be in PNG, GIF, or JPG format.
-
Image size - To edit the image size, select Best fit to have the image fill the width of the content area or select Set width and enter the width in the Pixels field.
Note: Note: The maximum width depends on the width and padding of the column where you add it in the layout. To change the padding for a column, highlight it and select Style under Email builder. In the Padding field, choose how much space to add between the content with the column and the borders.
Tip: Tip: To prevent mailbox providers from imposing their own image sizes, size all images before you add them to your email as some mailbox providers rely on the true dimensions of the image instead of the specified dimensions.
-
Image alt text - Alternative text displays when a mailbox provider blocks imagesor when recipients choose not to show email images. Enter brief, but descriptive, text to increase your recipients' trust in your email and improve the likelihood they'll allow their mailbox provider to download your images.
-
Image link - To link to a web page from an image, enter its URL in the field.
-
Image alignment - To include text with an image, choose an image alignment, and use the editor to enter the text.
Social
To set the links and styles to use as the default social media information for your organization, move Social to the layout. Next, select the display style, the social links to display, and select Apply.
Update Style
To customize the look and feel of your email and each column in the layout, select Style from Email Builder.
Font
You can choose the font of the overall message and individual columns.
Tip: Set the overall style under All styles before changing the styles of columns.
-
To set the font and size of the text for the entire message, select them under All styles.
-
To set the font and size of the text for a selected column, select them under Column style
Backgrounds
You can choose the background colors of the overall message and individual columns.
-
To set the background color outside the layout of the message, select the color in Canvas under All styles.
-
To set the background color for the entire message body, select the color in Body under All styles.
-
To set the background color for a selected column, select the color under Background color.
To select a color from the color picker, select the color or enter its RGB or hexadecimal values, and select Apply.
Spacing and alignment
You can choose how much space to include between the edges of a column and its content, as well as choose how to align content within a column.
-
To add space between the column edges and content, select Padding to add 30 pixels or less to a selected column.
-
To adjust the content in a selected column horizontally , select Left, Center, or Right from Horizontal alignment.
-
To adjust the content in a selected column vertically, select Top, Middle, or Bottom from Vertical alignment.
Save Email
When you finish designing the thank you email, save the form.
Tip: The email is sent to the email you use when testing a form in test mode.