Get Started with Optimized Donation Forms
Optimized Donation Forms provide an engaging and streamlined donor experience with continuously refined data and branding cards. Branding cards help build trust with donors using images you choose that represent your organization. To learn how to create branding cards, see Get Started with Branding Cards.
Create form
From Online Giving, Overview select New donation form. Next, select Optimized form. Under Donation, Form name and branding enter a name for the form.
Branding card and goal meter
|
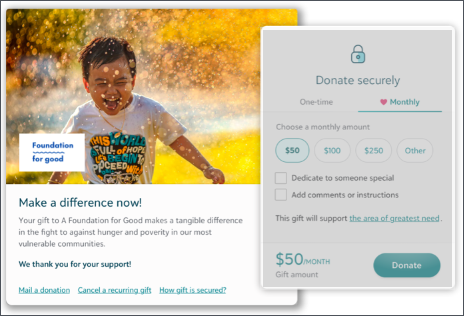
Select the appropriate branding card that will engage donors and build credibility and trust to your cause. The form has a default branding card that you can customize or add your own. They can include a call to action and goal meter. If the branding card you choose has a goal meter, you can set the form's fundraising goal, start date, and offline gifts from cash and checks under Goal meter. To learn how to design a card, see Get Started with Branding Cards. Note: Goal meters include donor cover fees and the only the first payment of a recurring gift. If you prefer to embed a goal meter on your website, you can create one from Website Components. |
|
Default to monthly gift
To encourage reliable recurring support, you can choose to show Monthly as the default gift options on the form instead of One-time. Select Default monthly gift under Donation.
|
|
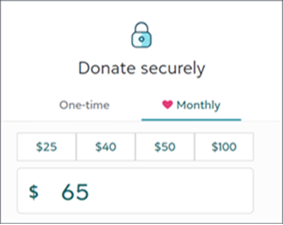 Monthly gift option as default on the form. Monthly gift option as default on the form. |
Set gift range
By default, one-time and monthly recurring gift options always display on the form. To increase the amount donors give, under Ask amounts, enter the lowest and highest one-time and recurring gift amounts you expect to receive.
Set designations
Donations are assigned to a specific designation that represents their financial purpose. Select the designations for the form under Designations. To present a default selection to donors, select a designation under Default designation.
When you add multiple designations to the form, you can change their display names and move them to an order you prefer.
-
To change their display names, under Designation list, select Set labels. Enter a new display name for each designation you want to relabel.
Tip: The default designation's label is Area of greatest need, but you can change the label if you prefer.
-
To change their order, Designation list, select Set order. Using the arrows, drag and drop each designation in the order you prefer.
To learn more about designations in your CRM, see:
-
Designations in Blackbaud CRM
-
Designations in Altru
Tip: At least one designation is required on a donation form, but you can pass designations through the form's URL. To learn more, see Fundraising Parameter Hyperlinks.
Enable comments
To enable donors to add more information about their gift, select Comments under Additional options. Donor-entered comments display on the gift record.
Set gift processing
Optimized Forms connect to a live payment configuration in your organization's Blackbaud Merchant Services account.
-
If you have one Blackbaud Merchant Services account with only one payment configuration, the form automatically connects to that configuration.
-
If you have multiple accounts or payment configurations, you can select a payment configuration under Payment and fees, Gift processing.
Set transaction processing
After you configure the form, you can test it to ensure it's easy to use and not confusing to donors. By default, the form is in test mode. Under Transaction processing, you can choose to create one-time gift test records while testing it. Test mode doesn't support recurring gift test records.
Warning: Only select Start processing donations now after testing the form because you can't switch the form back to test mode or use test credit card numbers. However, when you copy a form, the copy is automatically in test mode.
Set fee coverage
To bring more revenue to your mission, configure the form so your donors or Blackbaud covers the online transaction fees. Under Fee coverage, select how your organization will cover fees for donations given through this form. | 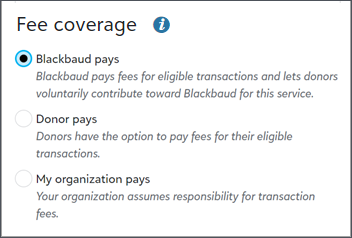 |
Add phone and mailing address
Profile fields let you collect more information, and they are optional for donors to complete after they make their donation. Under Profile fields, you can select phone and mailing address.
Add an appeal
Under Hidden fields, you can add an appeal to track a specific fundraising initiative. This information automatically writes to gift records.
Add consent preferences for communications
To enable donors to choose specific communications they're interested in receiving, you can select up to six channels and categories for them to choose from. You can also include a consent statement, which is necessary if you add only one opt-in and would like it to be on one card. Otherwise, it will it will appear on the contact card. To learn more, see Add Consent to Donation Forms.
Review and edit Thank You message and email
Under Confirmations, you can configure what happens after donors make their donation.
Thank you message
After a donor submits the form, the thank you message and its content appear in the browser. Its intent is to thank the donor and confirm that their gift was successful.
If you choose the default content selection, the thank you message includes the transaction information.
If you choose to redirect donors to a webpage, you can include your own content without the transaction information.
Social sharing
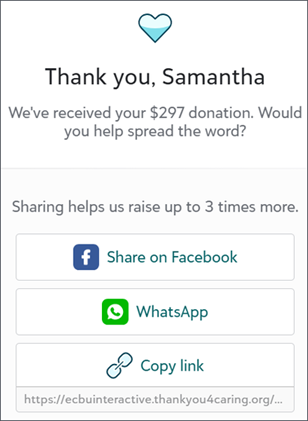
If you select Use default content, under Thank you message, you can enable social sharing to encourage donors to share their support of your organization with their friends. Forms must launch from a hyperlink or button using the Optimized Loader Script on your website for the social sharing options to appear to donors.
To enable social sharing, select Display social sharing options under Social sharing.
After making their donation, a donor can quickly share the form with Facebook and WhatsApp. To share with other platforms, such as LinkedIn, donors can select Copy link and paste it in their message.
If a donor's device or browser supports native sharing, they may see More share options. By selecting this option donors can share the form quickly and directly via text messages, AirDrop (for Apple devices), or email without copying the link.
Thank you email
After a donor submits the form, the thank you email is sent to confirm their donation with transaction details. The email contains a default message and personalization. You can edit the subject line, the message, and the reply-to and from names and email addresses.
Warning: This email is not a receipt. To issue receipts use
To edit the email message:
From Confirmations, select Open email designer.
Hover over the message, and select Edit.
In the text editor, make any changes you need.
To make personalized changes, select Merge, Donation Forms, and choose the fields you want to add.
Select Apply.
Tip: If you update the content of the email, you can re-insert merge fields, such as transaction details, from Merge, Donation Forms in the text field.
To learn how to design your email, see Thank You Email for Donation Forms.
Send staff notifications
To notify staff when donors submit gifts through the form, enter up to 10 email addresses under Confirmations, Donation notification. In addition, if you don't want to notify staff for every donation made through the form, you can set the minimum gift amount. For example, set the amount to $100, and notifications will only be sent for donations equal to or greater than $100.
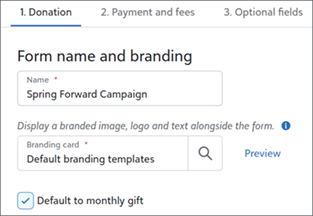 Select default to monthly gift.