Define Routes Within Workflows
Routes can be defined for each workflow level and sub-level when setting up the overall workflow. These routes dictate the levels to which applications can advance once review in its current level has been completed.
Tip: This process can be used in conjunction with the other Workflow Level Automation methods. Additionally, automated routing does not prevent manual routing.
-
Navigate to the Program Setup > Workflows area.
-
Either create a new workflow or edit an existing one.
-
Select the Users and Routes tab.
-
Select the Routes button next to the workflow level or sub-level.
-
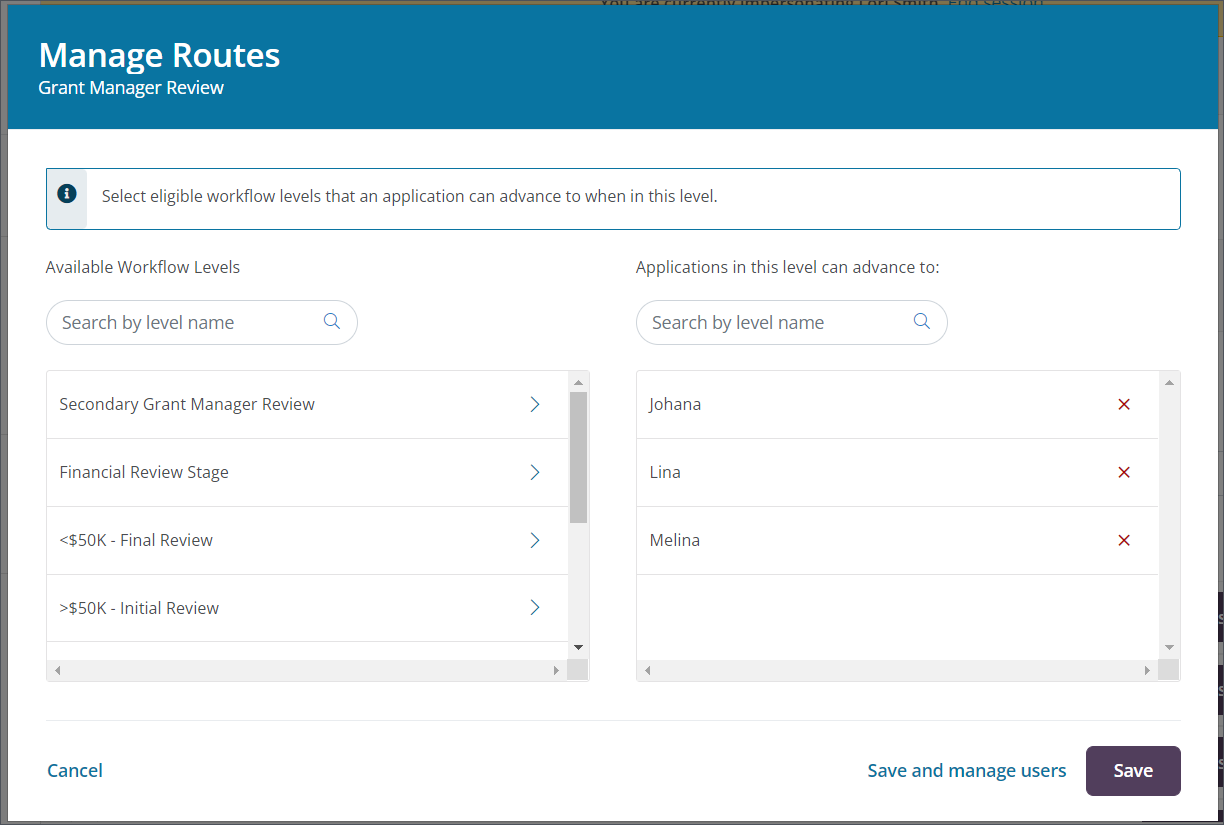
In the Manage Routes screen, update the eligible workflow levels that an application can advance to when in this level.

-
Select the arrow next to the level in the Available Workflow Levels section to add it to the Applications in this level can advance to section.
Note: Only active workflow levels and sub-levels will be shown. Any levels that have been disabled will not appear in this list.
-
Select the x icon next to the level in the Applications in this level can advance to section to remove it from the workflow level's routing.
-
-
Save all changes to update the routing.