Create events and projects
The Create Opportunity page allows users to build and publish volunteer opportunities to be displayed to employees within a community. Opportunities can be either Events or Projects.
To manage events settings and customize the Create Opportunity page for your community, see Event settings.
 Events versus projects
-
Events allow you to set specific dates for employees to sign up.
-
Projects are longer-term opportunities that allow you to set goals and milestones.
 Permissions
-
Create events: Only users with the Can Create Events permission can create events within the community. You can limit this permission to selected admins or allow all employees to create events.
-
Create projects: Only users with the Can Create Project permission can create projects within the community. You can limit this permission to selected admins or allow all employees to create projects.
-
Manage: The following users can manage published events and projects:
-
The event or project creator
-
Employees added to the event or project as 'Organizers'
-
Admins with the Can Manage All Community Events or Can Manage All Projects permissions
-
To assign permissions to roles, see Manage roles.
Create an event
 Enter general details and charity information
-
From the top menu, select Volunteer, then Create.
-
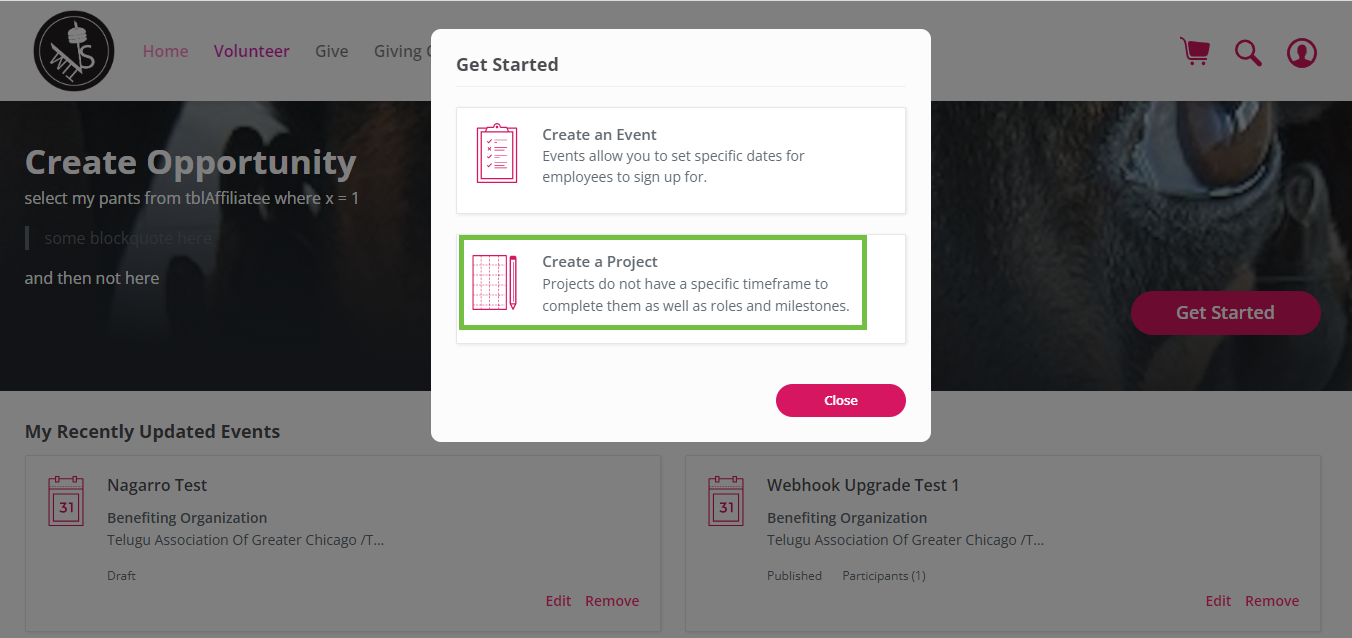
Select Get Started, then choose Create an Event (if applicable).
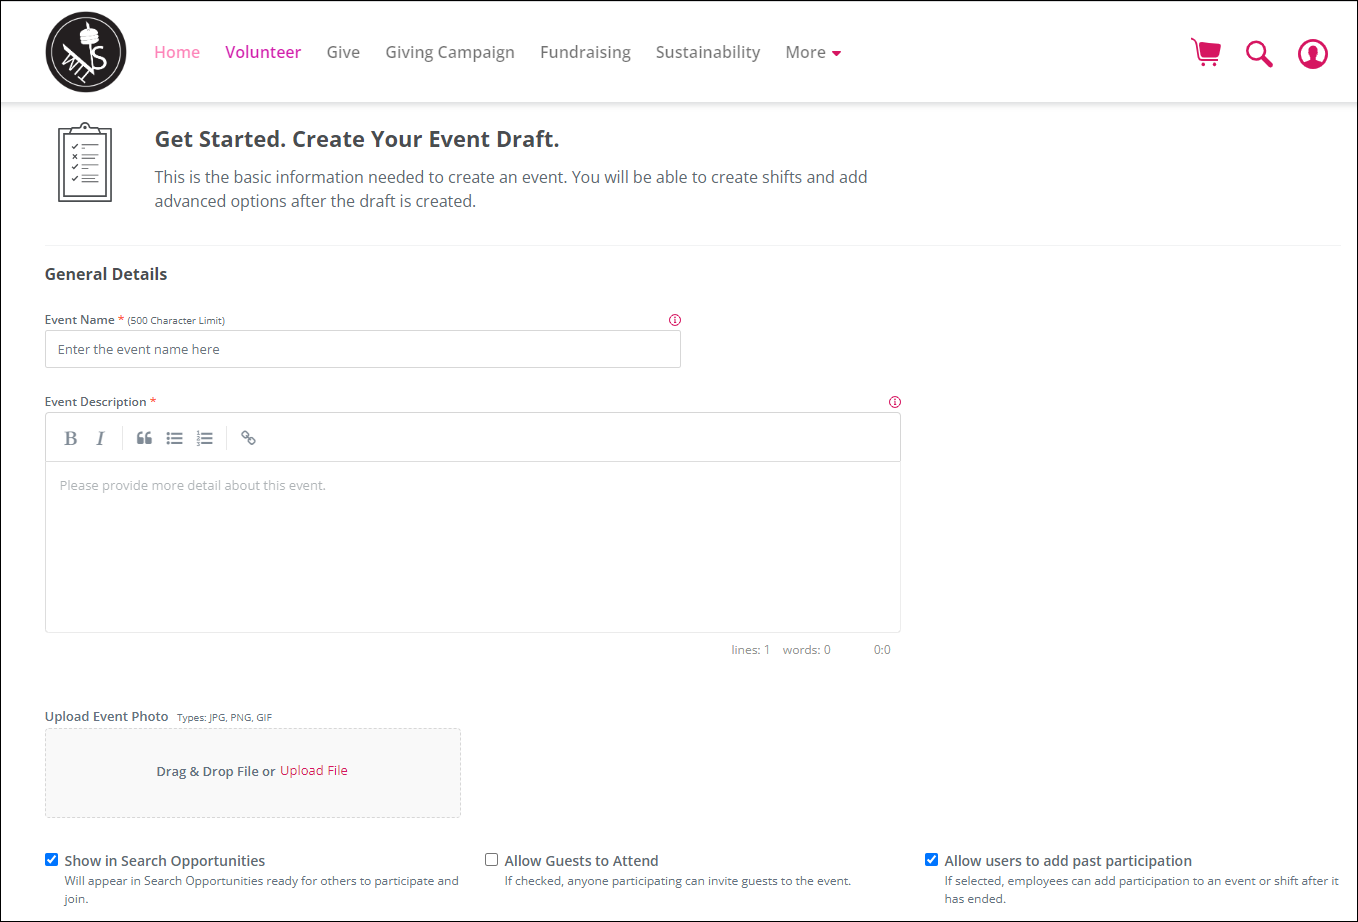
This will take you to a blank event draft.
Note: Some attributes are dependent on Community-level settings. Fields with a red asterisk beside them are required.

-
Under General Details, enter an Event Name and Event Description.
-
Under Upload Event Photo, either drag and drop a photo into the upload space or select Upload File to browse your device for images. The file types JPG, PNG, and GIF are accepted. The recommended size and shape for an image is a 300 x 300 pixel square.
-
Select which of the following options you would like to enable for the event:
-
Show in Search Opportunities
-
Allow Guests to Attend - if enabled for your community
-
Allow users to add past participation
-
-
Add a Location, select Virtual if this will be a virtual event, and (optionally) add meeting instructions.
-
Select a Benefiting Organization by using the Organization Search. If you cannot find the benefiting organization via the search tool, you can select the option enter your own outside organization if it has been enabled for your community.
 Identify the event schedule and shift settings
-
Under Event Schedule, fill in the fields for the date(s) and time(s), select the time zone, and indicate the event frequency. Ongoing events run continuously during the set date range. Recurring events have multiple discrete occurrences.
If this is a recurring event, choose from the following options:
-
If you want to end the series after a certain number of recurrences, select End after a number of recurrences. Enter the number of times you want to repeat this event. In I want this to happen ___ times, enter a count for all event instances.
-
If you want to end the series on or before a certain date, select End by a specific date. Select the applicable date from Recurrence end by date.
Tip: Ongoing events have a maximum duration of 25 years. Recurring events can only recur over the span of one year. Occurrences cannot overlap.
-
-
If you would like to limit the time period in which participants can sign up, select Setup Registration Dates and fill in the fields.
-
Under Main Shift Settings, create shifts for volunteers to sign up.
Every event has at least one shift. The first shift created will span the full event length set above in the schedule.
If Set default shift hours is selected:
-
The Hours field auto-populates for events that are scheduled up to 12 hours long.
-
The Hours field displays 0 for events that span more than 12 continuous hours. Manually enter the number of hours for this event.
After creating the initial draft, modify the main shift or add additional shifts as needed.
-
-
To limit the number of participants attending the event, under Shift Capacity, select Set Capacity. Enter the maximum number of participants in the Participants field.
 Indicate CRA eligibility and an associated volunteer campaign (if applicable)
-
If participation in this shift is eligible for the Community Reinvestment Act (CRA), select CRA eligible.
-
If participation applies to a volunteer campaign, select the applicable campaign from the drop-down menu. Otherwise, select None.
 Enter skills, types, categories, and tags (optional steps)
If applicable, enter skills, type(s), category (or categories), and tag(s) that apply to this event.
-
Enter Skills needed for the event.
-
Select an Event Type. If your organization has a lot of events, this can help employees filter their search.
-
Select an Event Category.
-
In Event Tags, select applicable event tag(s).
For more information on skills, see Skills.
To manage event types, categories, and tags, see Event settings.
 Identify event contacts and answer required questions
-
Enter Event Contacts that will display on the event page.
-
If applicable, select Answer to respond to any required questions.
-
If applicable, select Answer to respond to the CRA Survey.
 Publish the event
-
Select Save Draft.
-
Review and adjust details on the draft.
-
Edit details.
-
Create signup questions.
-
Upload documents and disclaimers.
-
Add or organize event photos.
-
-
If your organization requires approval, select Submit for Approval. If your community has event start date and event end date approvals set, an alert appears requiring confirmation of accuracy. You will receive an email advising that the event is under review.
-
When you are ready to publish your event, select Publish Event. The Manage Event page appears. For more information, see Manage events and projects.
Create a project
 Enter general details and charity information
-
From the top menu, select Volunteer, then Create.
-
Select Get Started, then Create a Project.

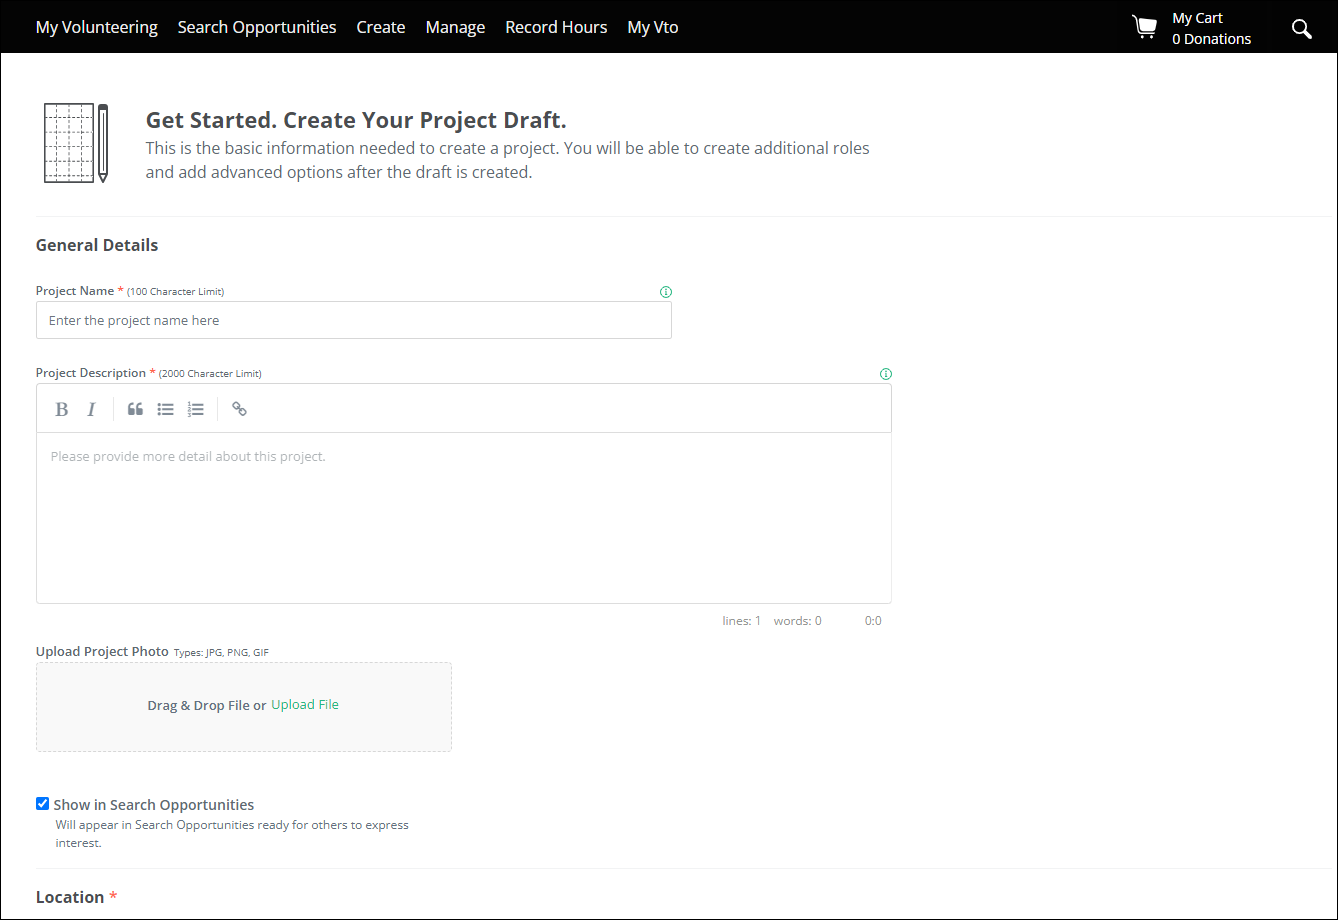
This will take you to a blank project draft.
Note: Some attributes are dependent on Community-level settings. Fields with a red asterisk beside them are required.

-
Under General Details, enter a Project Name and Project Description.
-
Under Upload Project Photo, either drag and drop a photo into the upload space or select Upload File to browse your device for images. The file types JPG, PNG, and GIF are accepted.
-
Select whether you would like this project to Show in Search Opportunities.
-
Add a Location. Select Virtual if this will be a virtual project.
-
Select a Benefiting Organization by using the Organization Search. If you cannot find the benefiting organization via the search tool, select the option enter your own outside organization.
 Identify the project dates, registration options, roles, and campaign
-
Under Project Dates, select one of the following:
-
Standard: You have very defined start and end dates. Your volunteers will work together to achieve a goal or complete milestones.
-
Flexible: You have a flexible date range to recruit volunteers and to participate at their convenience during this span of time.
Note: To use the Participant Invited to Project email to recruit participants, select Flexible.
-
-
Under Registration Options, identify whether participants can express interest in or join the project.
-
Under Final Date to Register, indicate whether the registration date is open until the project ends or closed by a specific date.
-
Under Default Role, enter a Role Name and optional Role Description. This is the default role that volunteers can fill when they sign up for the project.
-
Set the number of Participants Needed. If you do not want to set a limit, select Set as Unlimited.
-
Select Add Skills to this Role if you would like to indicate what skills are needed. This can help employees search for roles they can fulfill based on their skill sets.
Note: To use the Participant Invited to Project email to recruit participants, add applicable skills to the project. -
If applicable, select the campaign that this project applies to.
 Enter project types, categories, and tags (optional steps)
If applicable, enter type(s), category (or categories), and tag(s) that apply to this event.
-
Select a Project Type. If your organization has a lot of projects, this can help employees filter their search.
-
Select a Project Category.
-
In General Tags, select applicable project tag(s).
 Answer required questions
-
If applicable, select Answer to respond to any required questions.
-
If applicable, select Answer to respond to the CRA Survey.
 Publish the project
-
Select Save Draft.
-
Review and adjust details on the draft.
-
Edit details
-
Upload documents and disclaimers.
-
Add or organize event photos.
-
Set goals.
-
-
If your organization requires approval, select Submit for Approval. You will receive an email advising that the project is under review.
-
When you are ready to publish the project, select Publish Project. The Manage Project page appears. For more information, see the help topic Manage events and projects.