Create a Donation Campaign
Before creating an Online Giving donation form, you must first set up a donation campaign. Campaigns control permissions, configurations, and data associated with a specific fundraising goal, such as an End-of-Year Giving initiative.
When you define campaign attributes, those values become the default settings for any donation forms created within that campaign.
Tip: To test new configurations, you can copy a campaign along with its forms. Apply updates to the copied version. If the results aren’t satisfactory, you can delete the copy, and your original campaign and form settings remain unchanged.
Create basic campaign configuration
-
Go to Fundraising, Donation Management, and Create a New Campaign.
-
Enter a campaign name and description.
-
Select a security category to control permission to edit and manage the campaign.
-
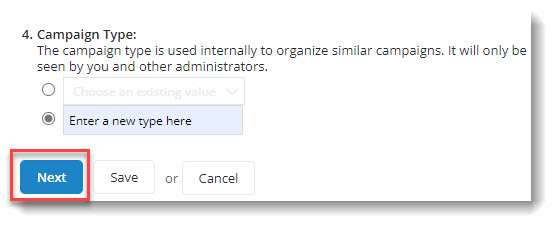
[Optional] Select or create a campaign type to help filter, sort, and group campaigns in lists, reports, and queries. The campaign type is only used internally.

Choose financial setting and goal
-
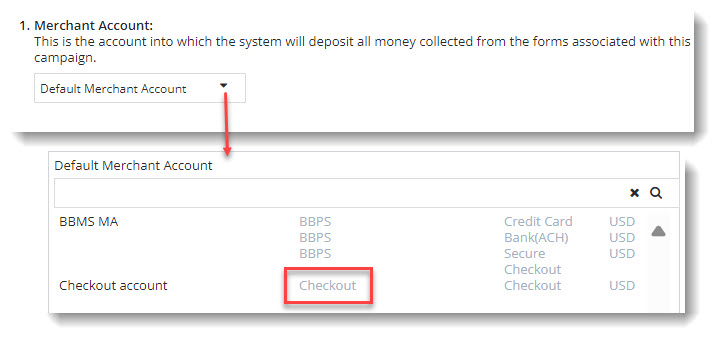
Select a merchant account with a Checkout gateway. For help setting up a Checkout gateway, see Payment Processing.
-
[Optional] Set a fundraising goal and maximum amount allowed for a single transaction.
Assign donors to a group
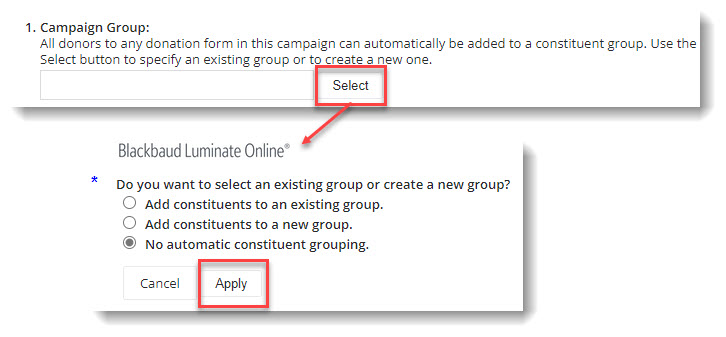
[Optional] Select or create a group to which all donors will be added. Campaign groups can be used for emails, queries, and reports.
Use the Select button to open the options to choose:
-
Add constituents to an existing group
-
Add constituents to new group
-
No automatic constituent grouping default
To add constituents to an existing group
Find and Select the group.
Select Apply. 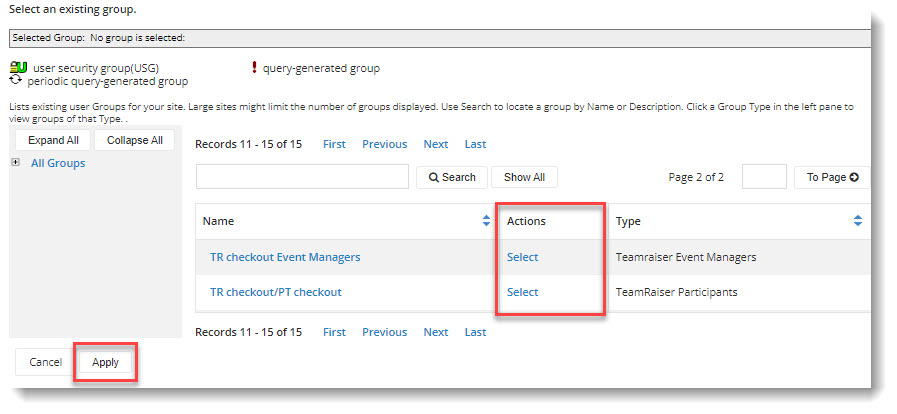
To add constituents to new group
-
Enter a Group Name.
-
Choose or create a Group Type.
-
Enter a Group Description.
-
Optional Set a Group Security Mode to assign permissions..
-
Select Apply.
Set up large gift handling and other gift notifications
[Optional] To receive notifications for large gifts:
-
Select Yes, gifts greater than or equal to the specified amount should be treated uniquely.
-
Set a Large gift amount threshold.
-
Select or create a group to which donors giving more than the threshold are automatically added. See Configure groups.
-
Enter email addresses, separated by commas, to notify appropriate stakeholders.
[Optional] To receive notifications for other gift types (e.g., tributes, premiums, memberships):
-
Select Yes, notification emails should be sent to those specified below.
-
Enter email addresses separated by commas.
-
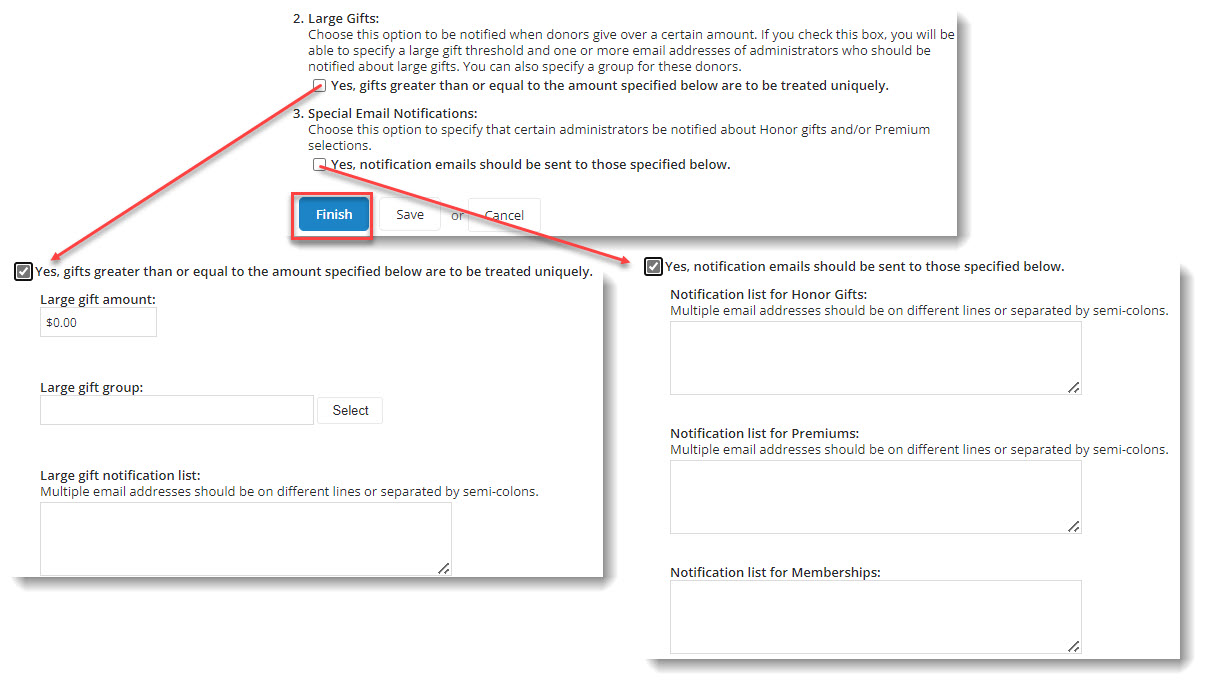
Select Finish. You are ready to create a donation form!