Add Workflow Levels and Sub-levels
When creating a workflow, you must set up the workflow levels and sub-levels before adding it to a program and routing applications.
Tip: Workflows must contain at least one workflow level. Sub-levels are optional. To learn about permissions, see Available Workflow Level Permissions.
-
Navigate to the Grant Manager Portal by going to yourcausegrants.com or your client URL. Sign in with your Blackbaud ID (BBID) or Single Sign-On (SSO) credentials.
-
After signing in, select Program Setup in the side navigation and then Workflows.
-
In Workflows, select Create workflow to create a new workflow or select Edit workflow in the table to edit an existing workflow.
-
When editing the workflow...
 Add new workflow levels
-
In the Structure tab, select Add workflow level.

-
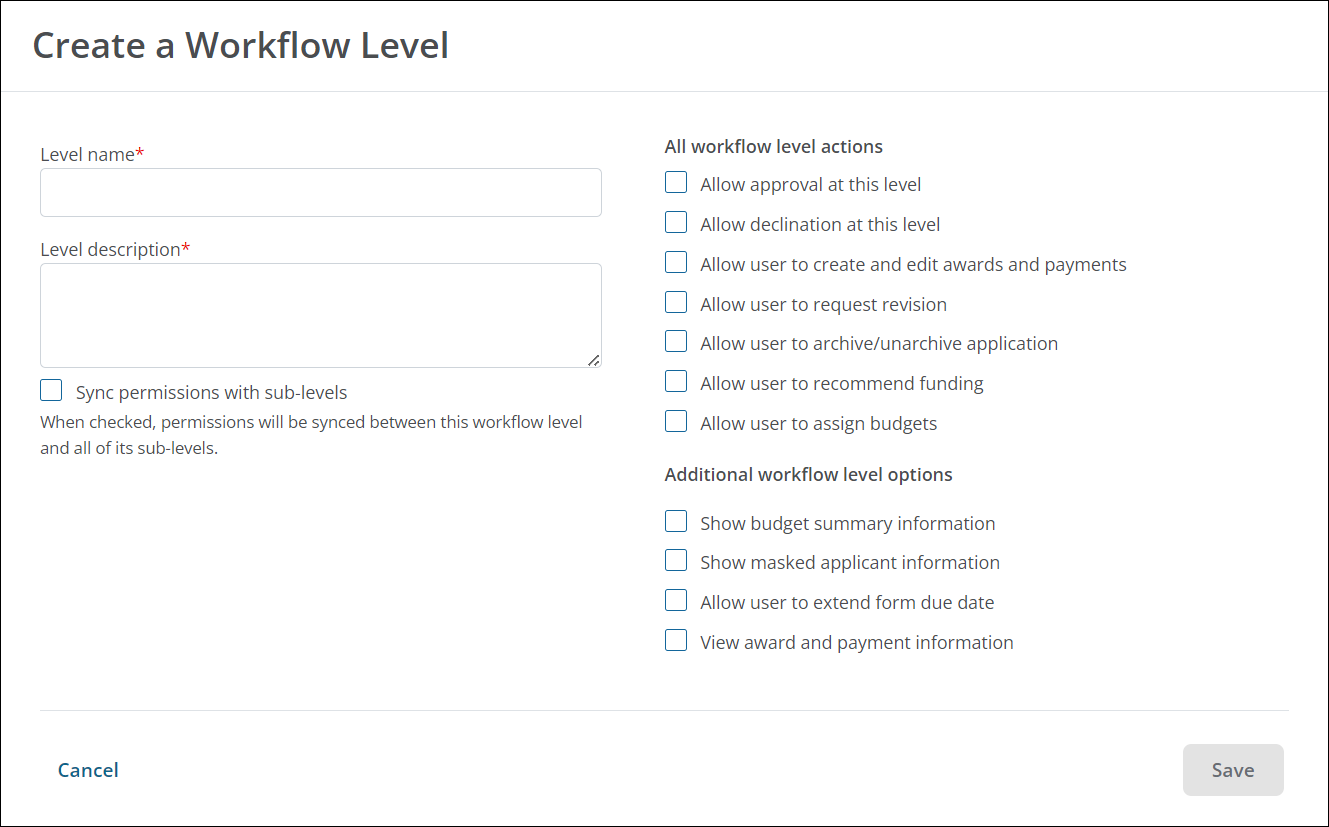
In Create a Workflow Level...
-
Enter the level name.
Tip: This information is internal and not shown to applicants. It's recommended to give each level a unique name to better distinguish between them when routing and reporting on applications.
-
Enter a description.
-
Select the permissions (actions and options) you want to enable for this level.
Tip: For a list of permissions, see Available Workflow Level Permissions.
-
Optional - Select Sync permissions with sub-levels to automatically synchronize permissions between this level and all of its sub-levels. This applies to both existing and future sub-levels.
Note: When enabled, sub-level permissions cannot be edited. To make any changes, the setting will need to be turned off.
Warning: If the workflow level has existing sub-levels when this setting is turned on, all sub-level permissions will be overwritten by the parent’s permissions.
-
Select Save to add the workflow level.

 Add new sub-levels (Optional)
-
In the Structure tab, select Add sub-level below the workflow level.
-
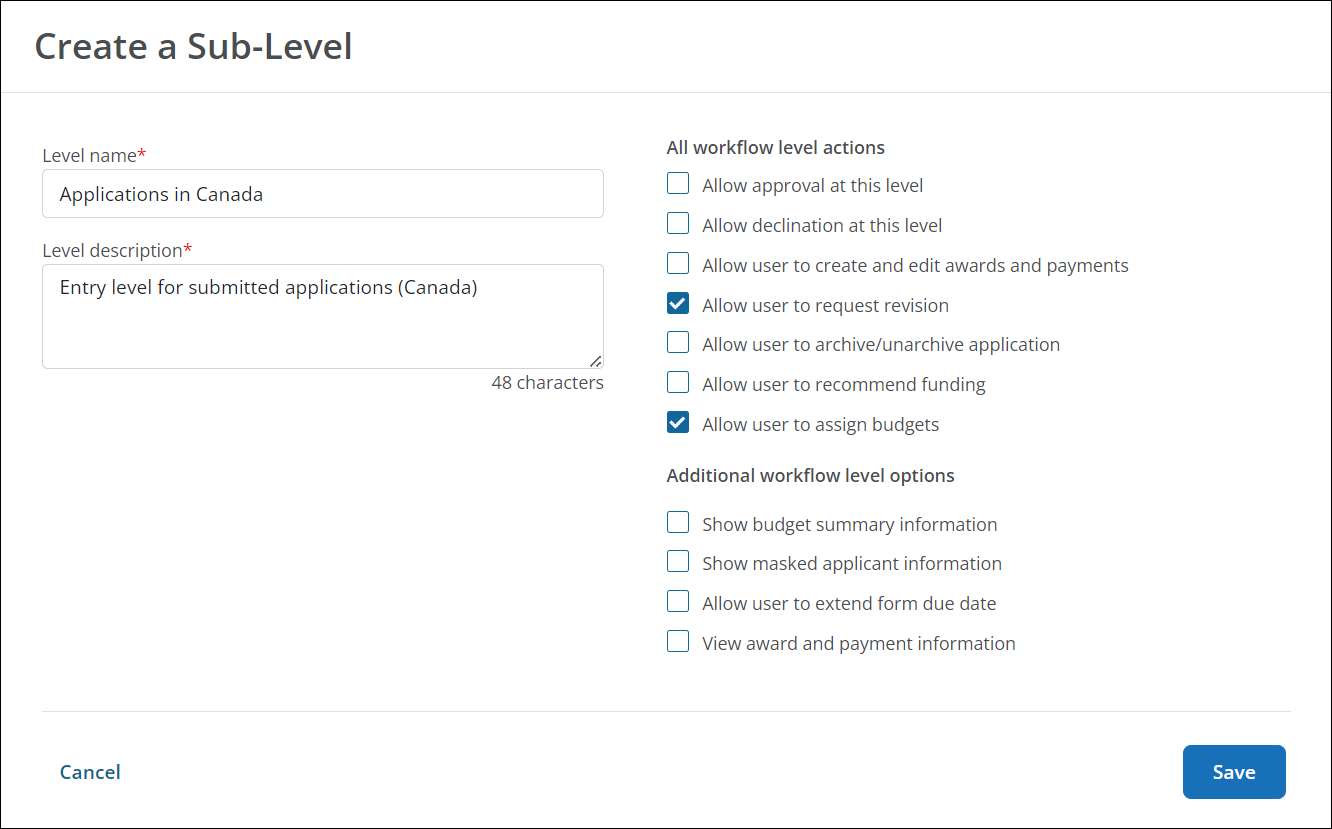
In Create a Sub-Level...
-
Enter the sub-level name.
Tip: This information is internal and not shown to applicants. It's recommended to give each sub-level a unique name to better distinguish between them when routing and reporting on applications.
-
Enter a description for the sub-level.
-
Select the permissions (actions and options) you want to enable for this level.
Tip: Sub-levels automatically inherit the permissions of the parent level. For a list of permissions, see Available Workflow Level Permissions.
Warning: If the sub-level is synced with the parent level, these permissions cannot be edited. To make changes, the Sync permissions with sub-levels setting will need to be turned off in the parent level.
-
Select Save to add the sub-level.

-
-
Next steps
You can continue to add levels and sub-levels to your workflow, tailoring the permissions as needed. Recommendations for next steps include:
Frequently asked questions (FAQs)
 How do I change the order of levels and sub-levels?
-
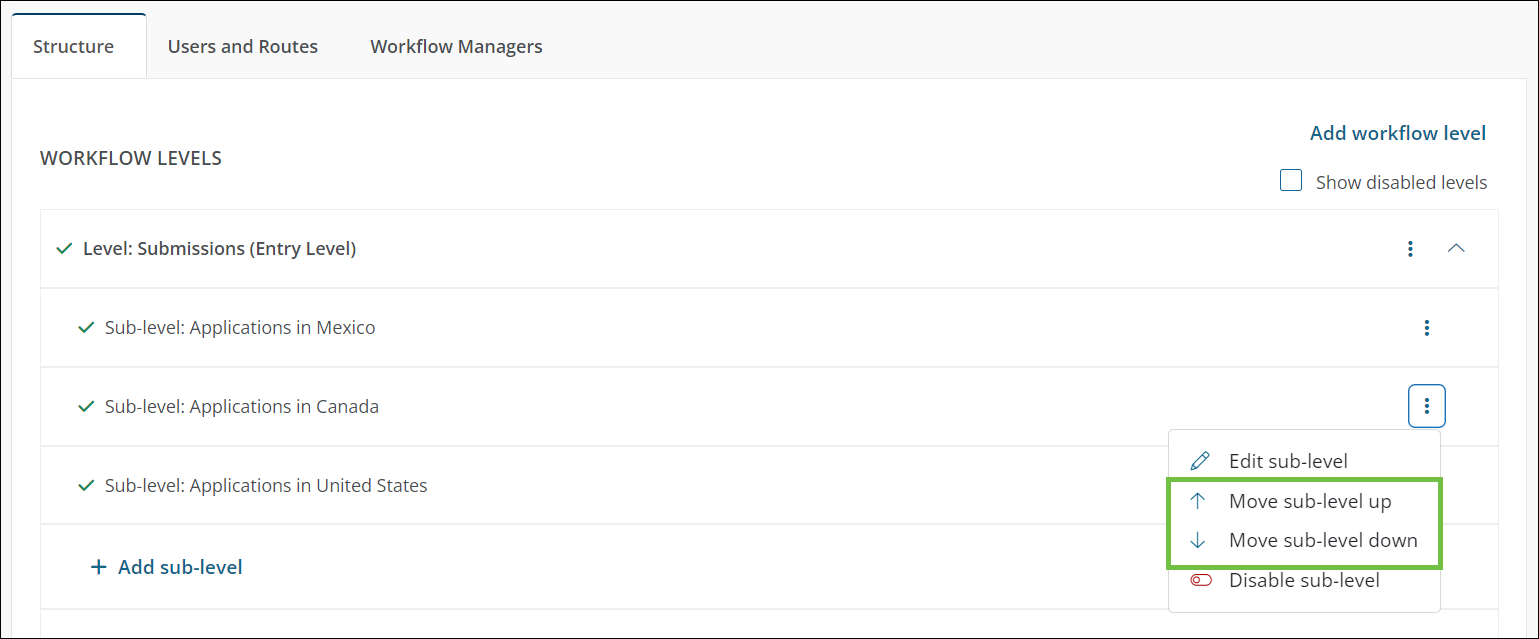
In the Structure tab, select the ellipsis icon next to the level or sub-level and then Move level up or Move level down.

-
Continue doing this until all levels are arranged in the order in which submitted applications should progress.
 Can permissions be synced across levels and sub-levels?
Workflow level and sub-level permissions can be synced, ensuring sub-level actions and options are always the same as the parent level. When creating the parent level, select Sync permissions with sub-levels to turn on this functionality. For more information, see Sync Workflow Level and Sub-Level Permissions.