Create Currency Fields
Use Currency fields to store money amounts in forms. The value uses the correct currency symbol, separators, and decimals based on the currency you set. Positive, negative, and zero values are supported.
These fields can appear on applicant forms and grant manager forms.
Tip: Use Cash amount requested to collect the amount an applicant requests. You can find it in Standard Components in the Form Builder.
Create a new field
-
Sign in to the Grant Manager Portal at yourcausegrants.com or your organization's URL with your Blackbaud ID (BBID) or Single Sign-On (SSO) credentials.
-
Open Program Setup, then Custom Forms.
-
Select the Form Fields tab.
-
Select Manage form fields, then Add new.
-
In Add New Form Field:
 Add field information
-
Enter a field name.
-
Optional - Enter a default label if you want it to be used each time the field is added to a form.
Tip: If you leave this blank, the field uses the field name as the label. You can update it later.
-
Optional - Enter a description for your own reference if needed. Applicants do not see this text.
Set field type
-
Set the field type to Currency.
Add minimum or maximum values (Optional)
-
Enter a minimum or maximum value if you want to limit the amount users can enter.
Tip: You can update these values later. Updates apply only to new instances of the field. Existing forms require manual updates to the field settings.
Update the key
-
The system creates a unique key based on the field name. You can update it if needed.
Tip: The key is used for API connections and to distinguish fields with similar names in reports, custom data tables, and bulk management.
Set the audience
-
Choose Applicant or Grant Manager as the audience.
-
Applicant: Appears on applicant and grant manager forms. It displays as read‑only for Grant Managers.
-
Grant Manager: Appears on grant manager forms only. Grant manager fields support multiple responses by default.
Tip: To capture a single answer, enable Field will store one answer per application. Multiple users can complete the field, and responses can overwrite each other.
-
Select a category (Optional)
-
Choose a category to help you filter and organize fields in forms and reports. If you do not choose one, the field is saved in Other.
Tip: To add a new category, select Add new category.
Control how responses copy (Optional)
-
If you want to prevent responses from copying into a new application, enable Do not copy responses when copying applications.
Tip: When enabled, the field displays without a response in the copied application.
Use in a Table field (Optional)
-
If you want to include this field in a Table field, select This is a table field.
When enabled:
-
The field does not appear as a standalone option in the Form Builder.
-
It appears only within Table fields, which support multiple entries.
-
-
Select Save to create the field.
Define accepted currencies
By default, applicants can choose their currency. To lock the field to one currency, update its Details in the form.
-
Add the field to the form.
-
In the Form Builder, point to the field and select Edit component.
-
Open Details.
-
Set Currency type to Use the following currency.
-
Choose the currency.
-
Select Save, then save the form.
Preview the field
Add the field to your form and review its settings before you start collecting responses.
Example: All currencies accepted
Applicants choose a currency from a dropdown beside the field.
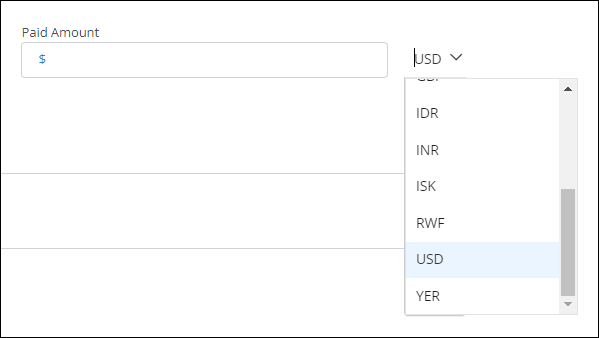
Example: Currency limited to USD
Applicants enter the amount in the single currency you set.

Frequently asked questions (FAQs)
What permissions do I need to manage fields?
You must have one of the following:
-
System - Can Manage Forms
-
System - All
What are the configuration options?
General
| Capability | Description |
|---|---|
| Automation | This field type can be used in budget automation and workflow automation. |
| Aggregation | This field type can be used in an Aggregation field. |
Field configuration
| Capability | Description |
|---|---|
| Form availability | This component type can be used in applicant and grant manager forms. |
| Single value entry | This component uses one value. |
| Masking | Masking is not supported. |
| Encryption | This component type does not support extra encryption. |
Form field configuration
| Capability | Description |
|---|---|
| Currency selection | Applicants and grant managers can change the currency type when the component is configured to allow it. Otherwise, the currency uses the value defined during setup. |
| Set values | You can set a specific value or use the value from another component based on defined conditions. See Set Field Values. |
| Calculated values | You can calculate a value using numeric operations or values from other components. See Calculate Field Values. |
| Validation | Validation options include Required, custom error messages, and conditional rules. See Set Up Field Validation. |
| Visibility | You can show or hide the component based on conditions and clear the stored value when it is hidden. See Show or Hide Form Fields and Components. |
Can users change the currency type when they complete a form?
Yes. They can change it only when the field is set to allow users to choose a currency.