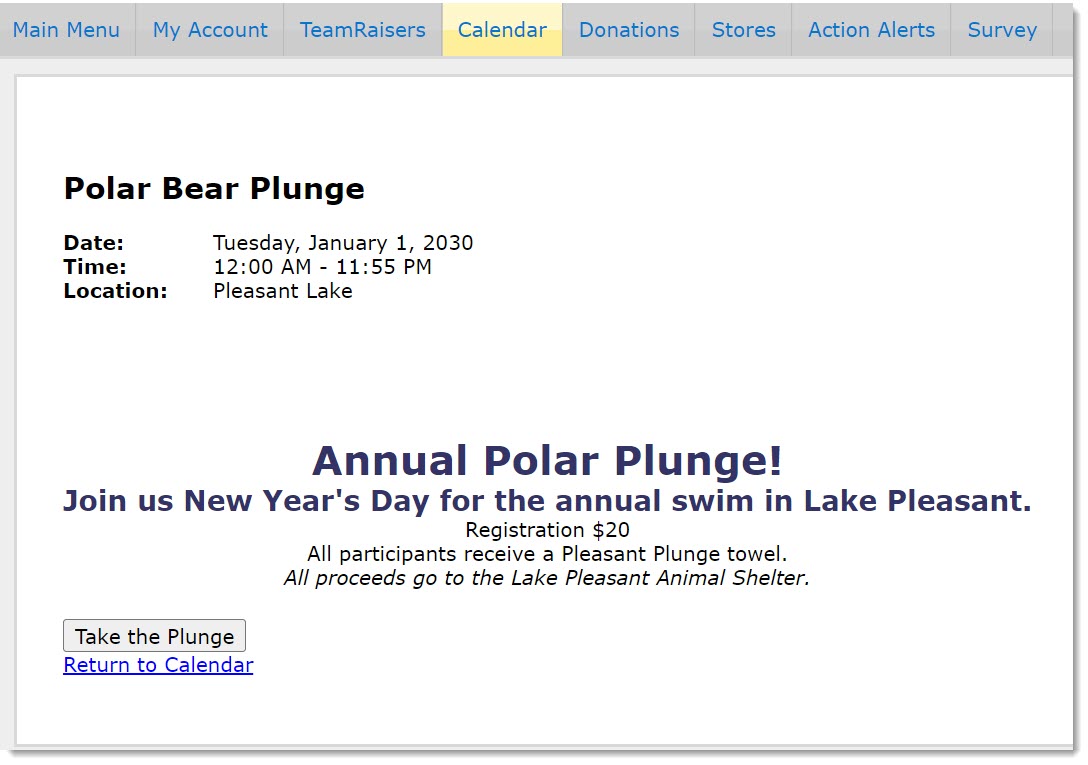
Follow the steps below to walk through creating an event. In this example we create a standard event, the Polar Plunge, to raise money for the local animal shelter.
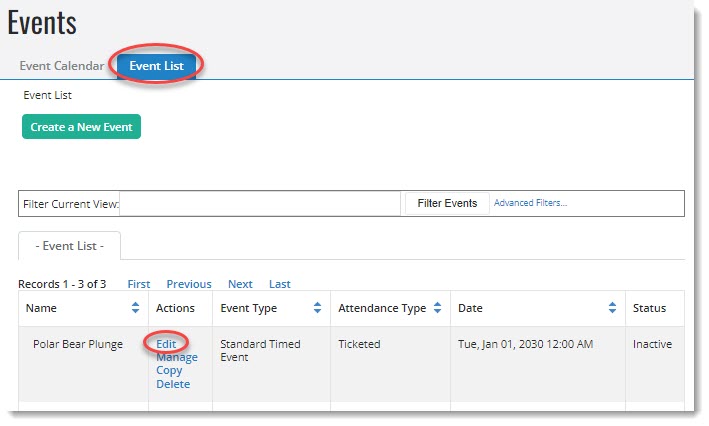
Open the events calendar
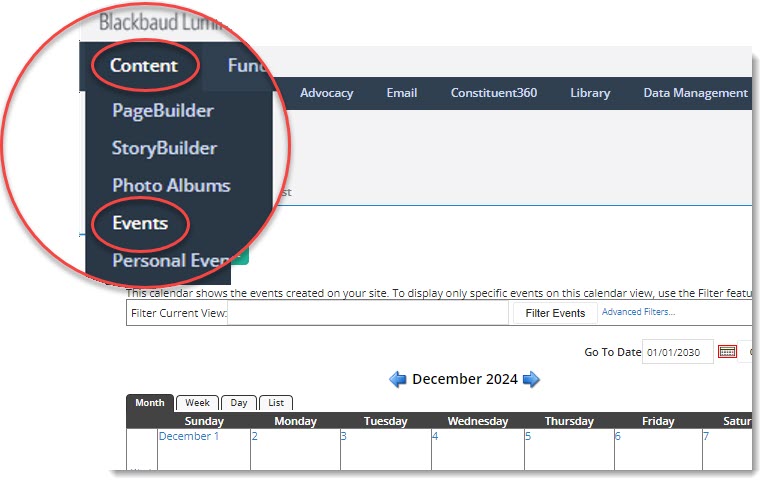
Select Content and Events.
Identify the new event
-
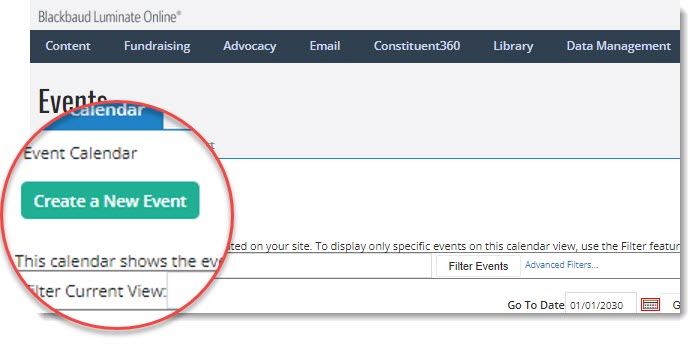
Select Create a New Event.
-
Enter an event name. For this example enter Polar Plunge.
-
Select a security category. To learn more about security categories and groups, see Managing Security. For this example, select General.
-
Select a page wrapper. If you would like to create a custom page wrapper, see Set Page Wrapper Editor CustomStyle.css. For this example, select Use the default Page Wrapper.
-
Select an event date.
-
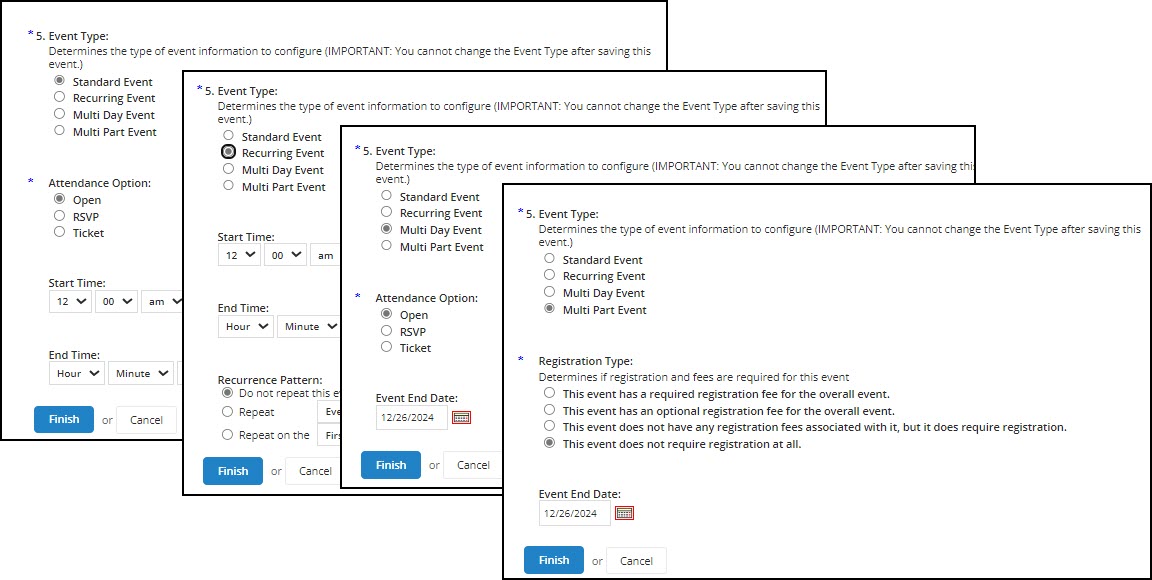
Select an event type. For this example, select Standard Event.
Note: Options available after this selection depend upon the type selected. Select a related topics link at the bottom of the page for more information.
-
Select attendance options. For this example select Ticket.
-
Select an event start time and end time.
-
Select Finish.
Note: You are now prompted to update additional event information. You may come back to update these settings at any time by selecting Edit in the Event List.
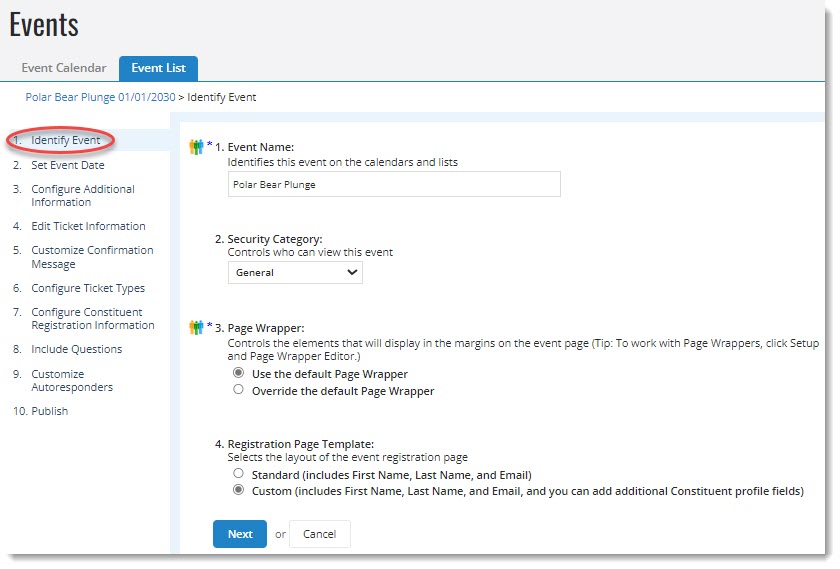
Select a registration template
-
Review the event name, security category, and page wrapper to ensure they are correct.
-
Select a standard or custom registration template. For this example select Custom.
-
Select Next.
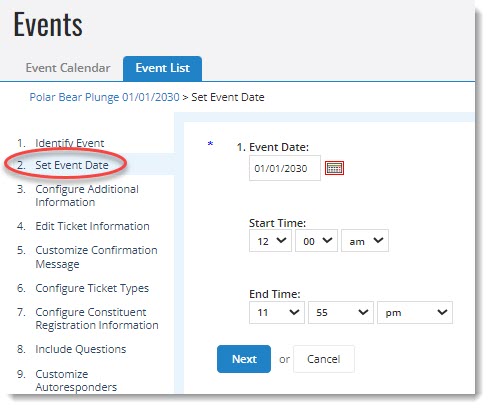
Set event date
-
Review the event date and time.
-
Select Next.
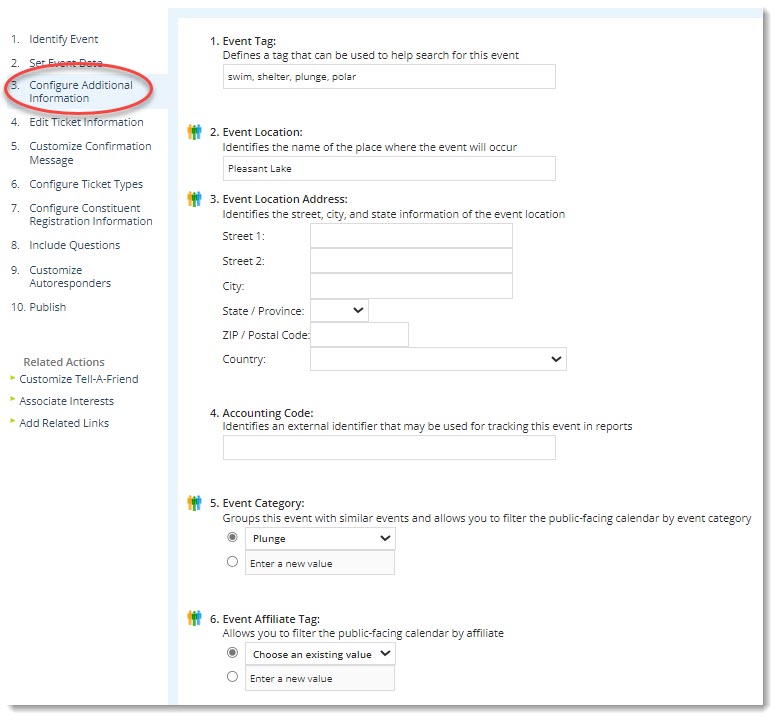
Configure additional details
-
If desired, enter event tags. For this example, enter swim, shelter, polar, plunge.
Tip: Tags can be used as keywords for searching and filtering your public calendar. See Create and Work with Filterable Calendars for more details.
-
If desired, enter a descriptive text name for the location. This will be visible to your constituents. For this example, enter Lake Pleasant.
-
Enter the location address as you want it displayed for constituents.
-
If desired, enter an accounting code for use in reports and queries.
-
If desired, select or create an event category. This value is used for internal searches and queries. For this example, select Enter a new Value and enter Plunge.
-
If desired, enter an affiliate tag.
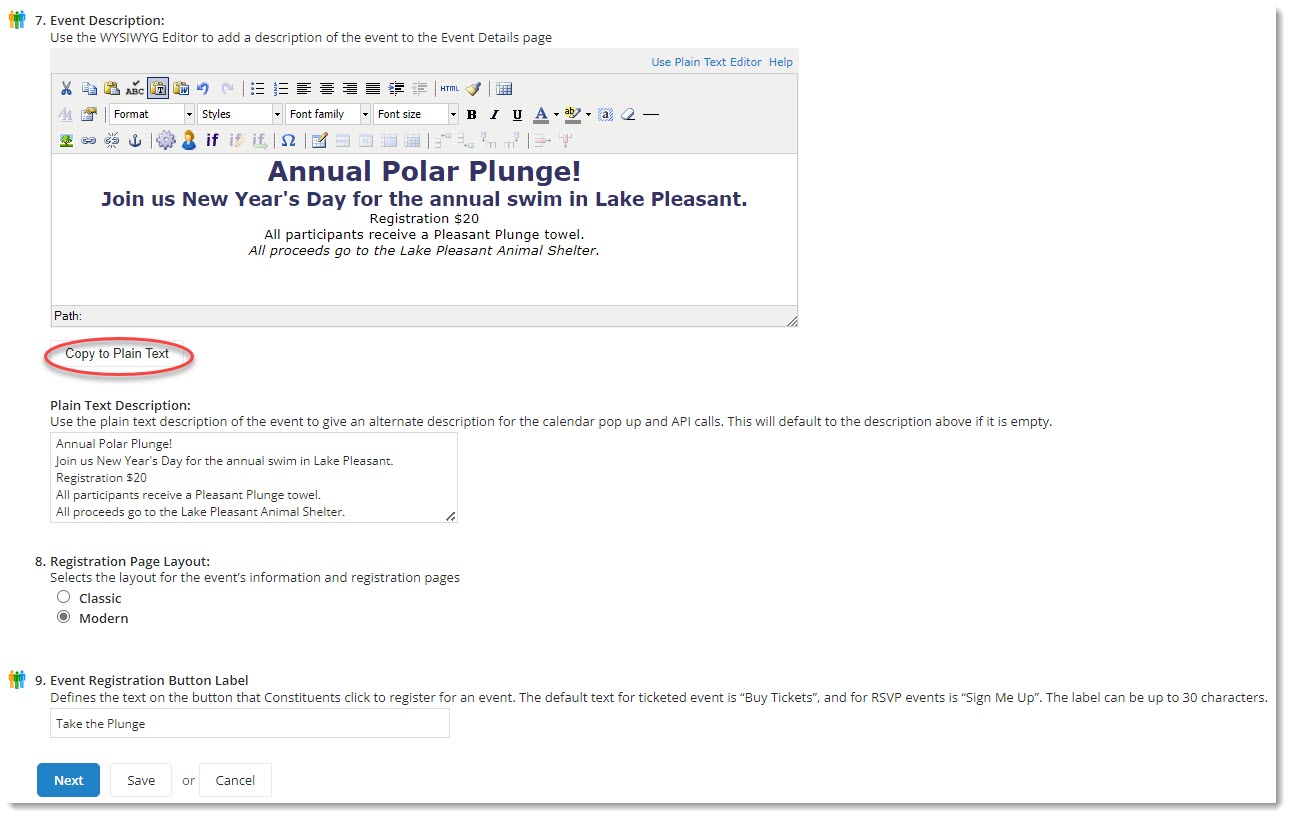
Create the event description
-
Use the WYSIWYG editor to add a description of the event as you want it displayed to your constituents. See Content Editor to learn more about this tool.
-
Select Copy to Plain Text or enter a description under Plain Text Description to display the message without styling for constituents viewing the description where HTML styles are not recognized.
-
Select the registration page layout. For this example, select Modern.
-
Enter a label for the button constituents use to registrar for an event. Examples include Buy Tickets, Register, and Sign Me Up. For this example, enter Take the Plunge.
-
Select Next.
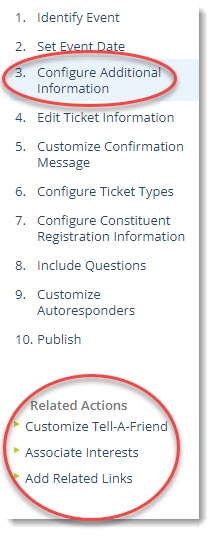
Note: Options to Customize Tell-A-Friend, Associate Interests, and Add Related Links can be configured under Related Actions. We do not need these options for this example. Select a link to learn more.
Edit ticket information
-
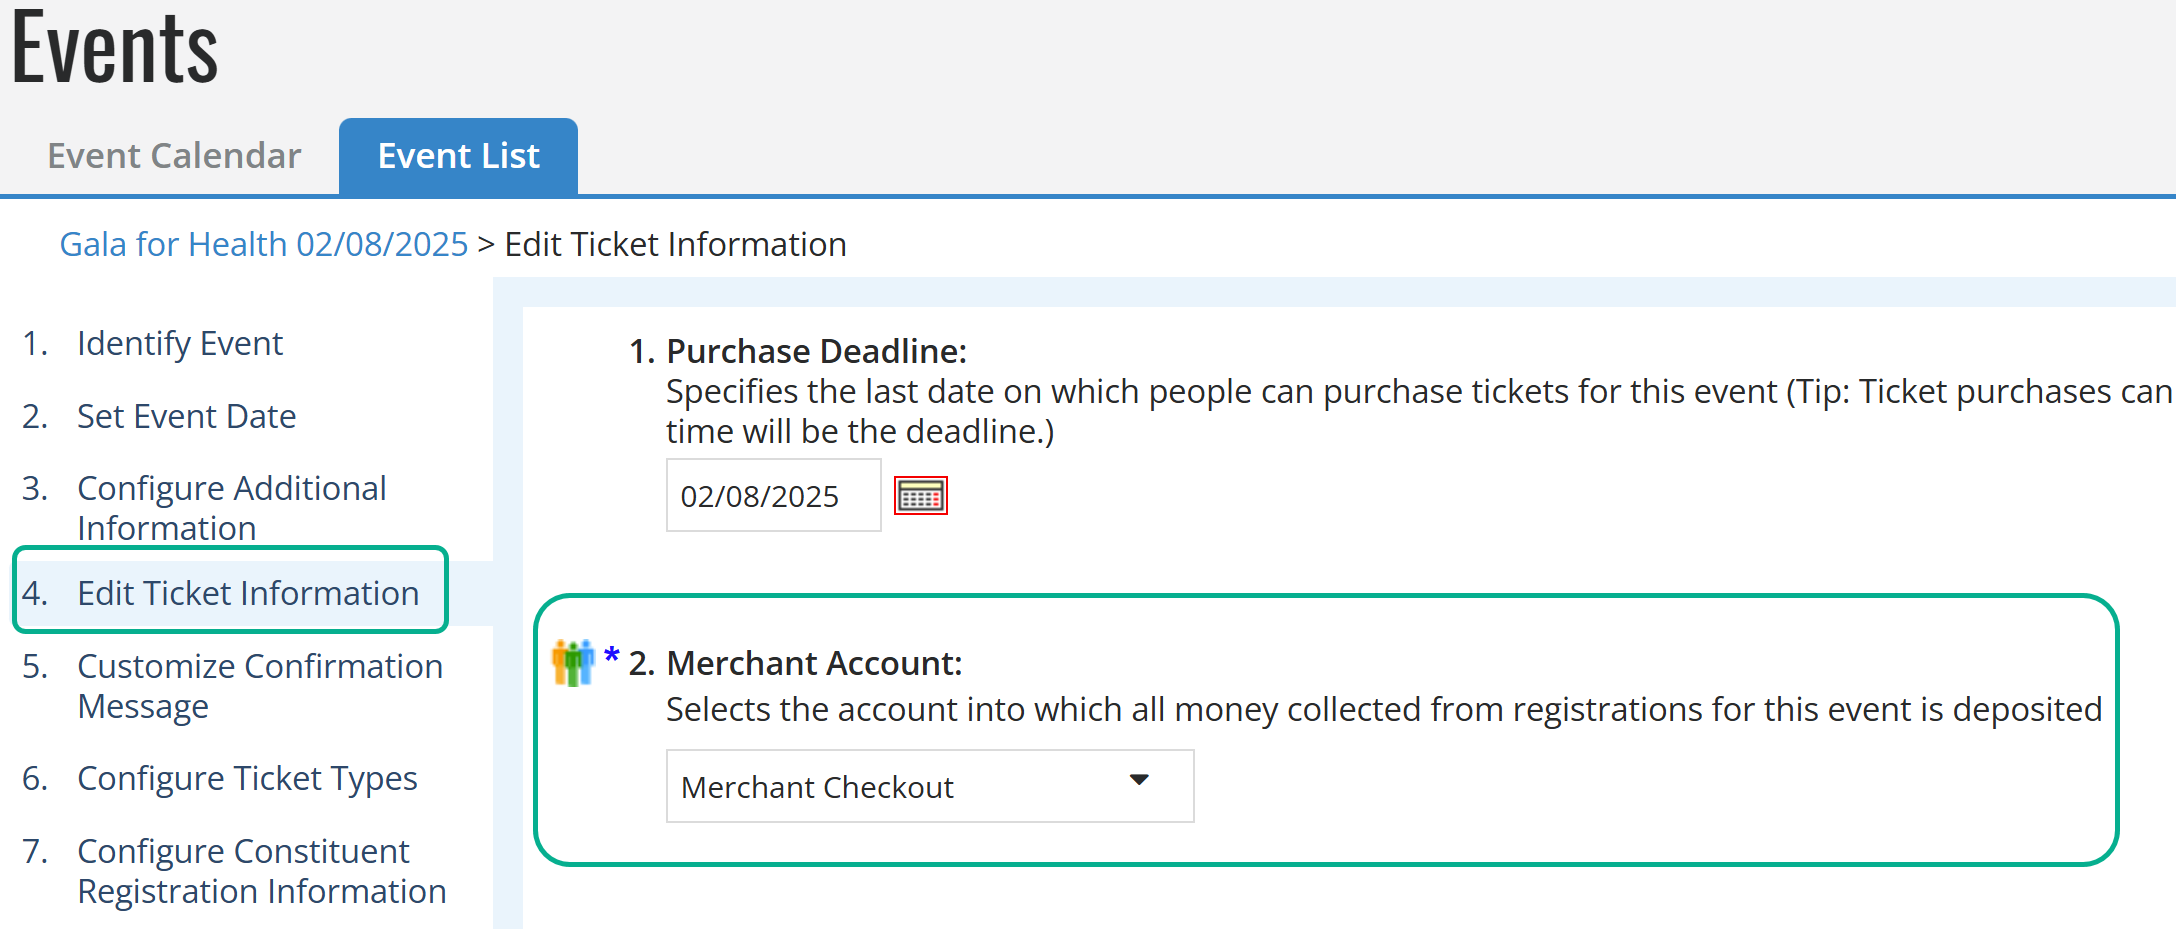
Select a purchase deadline and merchant account that is configured for checkout.
-
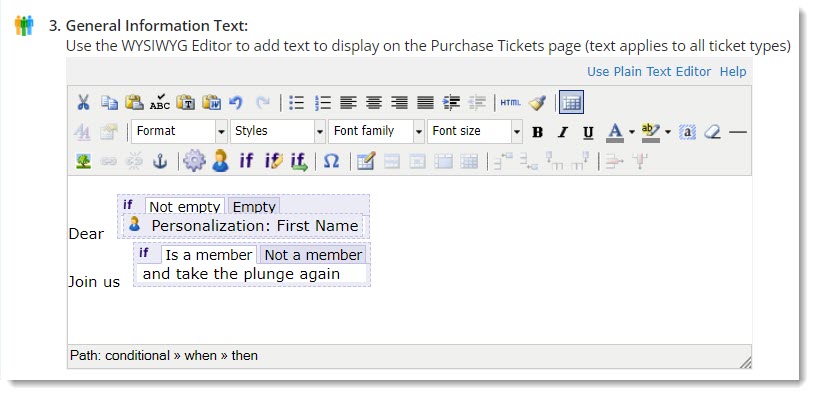
Enter general information to display on the purchase tickets page.
Tip: The WYSIWYG editor allows for personalized and conditional content. Consider targeting your message for constituents who have participated before, have opted-in to specific interests, or are new members of your community. To learn how, see Direct Content to Certain Users and Personalizing your Content.
-
If desired, select Yes, display the View the Guest List link for this event to make the guest list visible on the sign-up page.
-
If desired, select Notify to automatically email administrators when tickets are purchased. If selected, a field displays to enter email addresses. Separate multiple addresses with semicolons.
-
If desired, select Yes, display the Additional Gift field on the ticket purchase page for this event to allow constituents to make a donation from the ticket purchase page.
-
If desired, enter text to display before the Additional Gift field on the registration page.
-
If desired, enter text to display when the maximum number of tickets has been sold.
-
Configure email opt-in settings.
-
If you do not want to display an email opt-in option, select No, do not display the email opt-in checkbox. Opt-in constituents automatically.
-
If you do want to display an email opt-in option, select Yes, display the email opt-in checkbox, determine if the checkbox is selected by default, and enter text to display by the checkbox. If you do not enter text then Yes, I would like to receive email from <your organization> will be displayed.
-
-
Select Next.
Customize the confirmation message
-
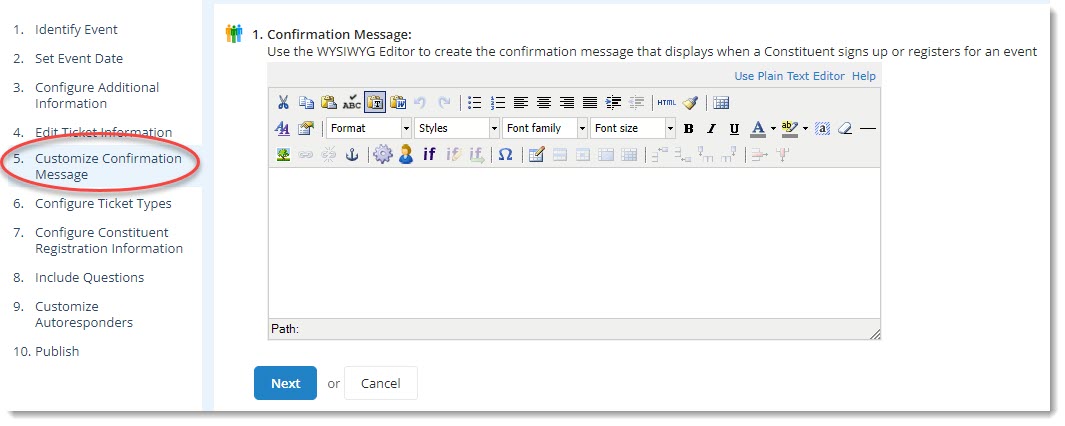
Use the WYSIWYG editor to create a confirmation message to display when a constituent registers for an event. For example, Thank you for taking the plunge! We are excited to see you on New Year's Day!
-
Select Next.
Configure ticket types
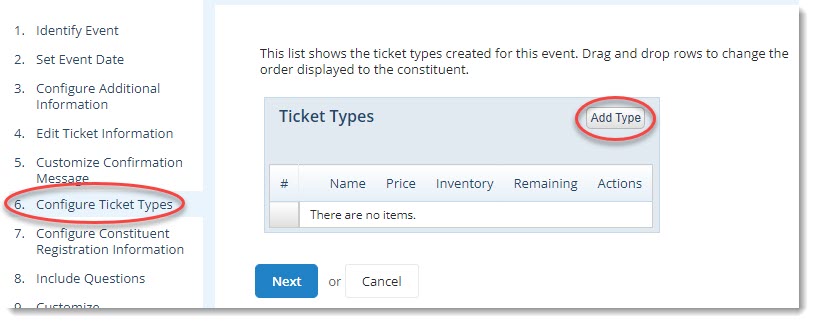
Select Add Type.
Edit ticket information
-
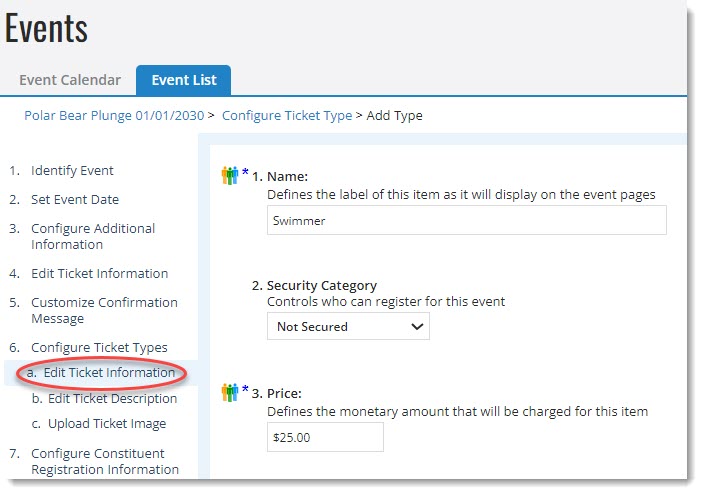
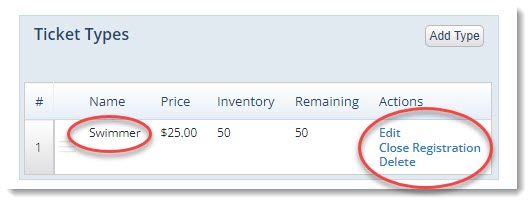
Enter the name of the ticket type. For this example, create one ticket type named Swimmer.
-
Select a security category.
-
Enter the ticket price, if applicable. For this example, enter $25.
-
If desired, enter the tax deductible portion of the price.
-
If you need to limit participation, select Limited inventory and enter the maximum number participants. For this example, enter 50.
-
If you wish to limit the number tickets that can be purchased in a single transaction, select Limited and enter a maximum number of tickets.
-
If you want to control who has the ability to purchase this type of ticket, enter a promotion code and distribute that code only to the eligible constituents. Examples of this may be members only, major donors, or volunteer passes.
-
Select Next.
Edit ticket description
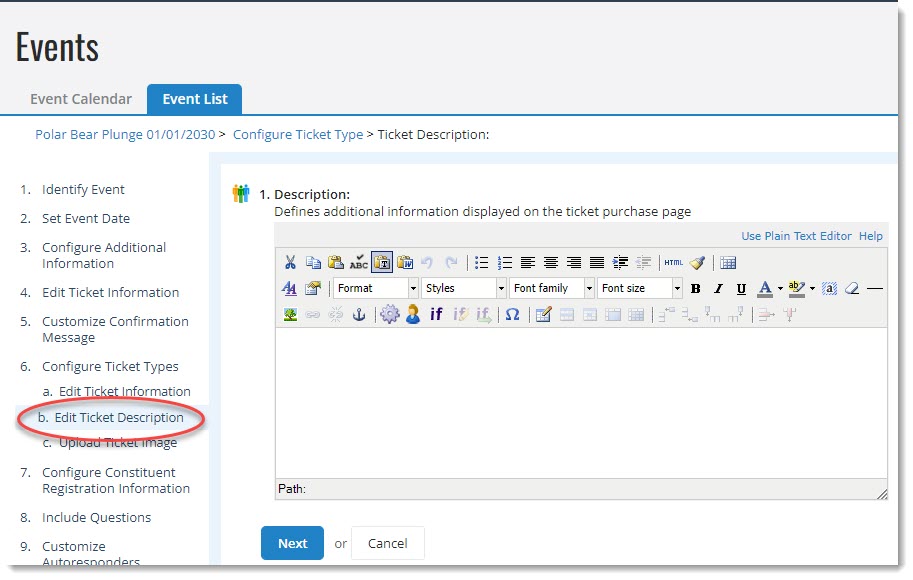
If desired, use the WYSIWYG editor to add additional information. Then select Next.
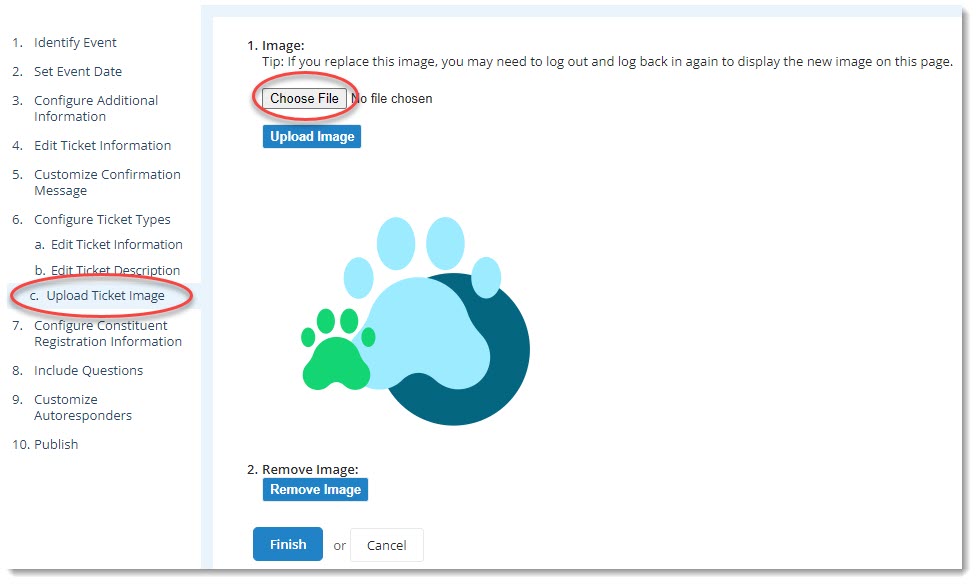
Upload ticket image
If desired, add an image, such as your logo, to appear on the ticket. See Image Library.
-
Select Choose File and select a jpg, png, or other image file.
-
Select Upload Image.
-
Select Finish.
Tip: Notice that Swimmer now appears in the ticket types list. You can select Edit, Clone Registration, or Delete to update your ticket types.
Configure constituent registration
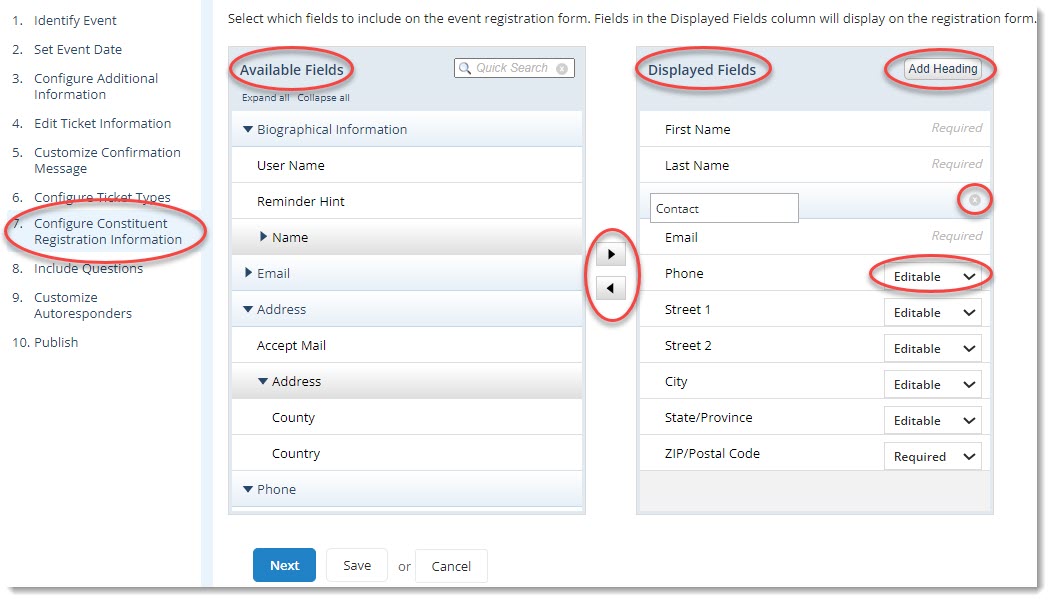
Select the information to collect on registration forms.
To add information, select an option from Available Fields and the right arrow. Then select Editable, Required, or Read Only.
To remove information, select an option from Displayed Fields and the left arrow.
You may also select Add Heading to label groups of fields. To remove a heading select the x after the label.
Select and drag fields and headings to rearrange them.
Include questions
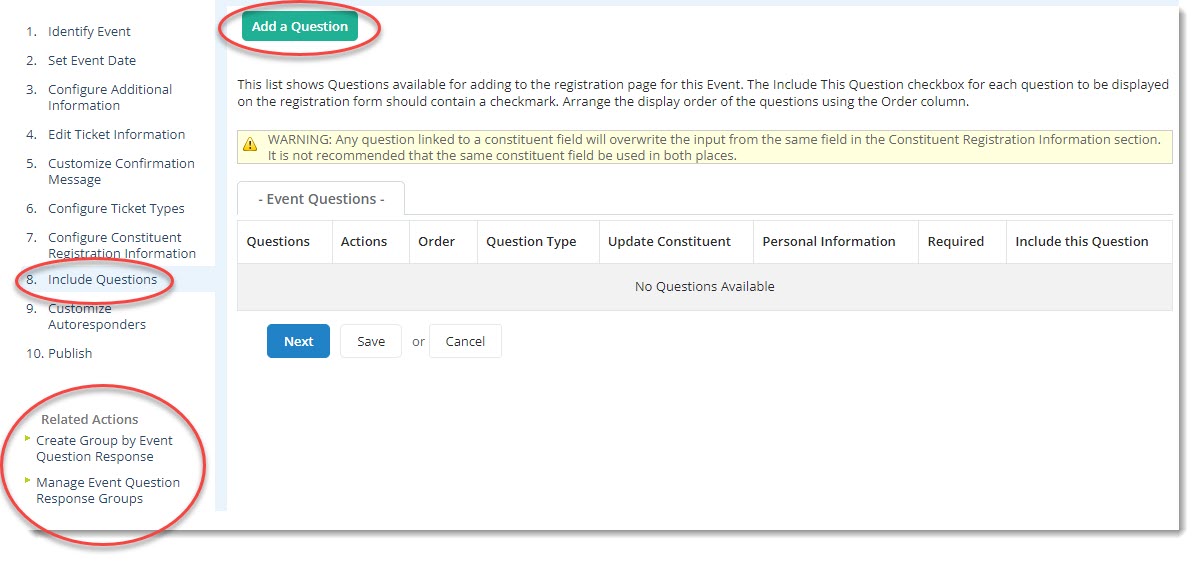
If desired, select Add a Question to gather more information on the registration form. The steps to add a question depend upon the type of question you select. To learn more about question types, see Surveys and Survey Questions.
Warning: Any question linked to a constituent field will overwrite the input from the same field in the Constituent Registration Information section. It is not recommended that the same constituent field be used in both places.
Note: Related actions include Create Group by Event Question Response and Manage Event Question Response Groups. These groups can be used for email, queries, and reporting.
Tip: The recommended checkout configuration includes reCAPTCHA v3. Do not add a separate CAPTCHA question to pages with the recommended checkout.
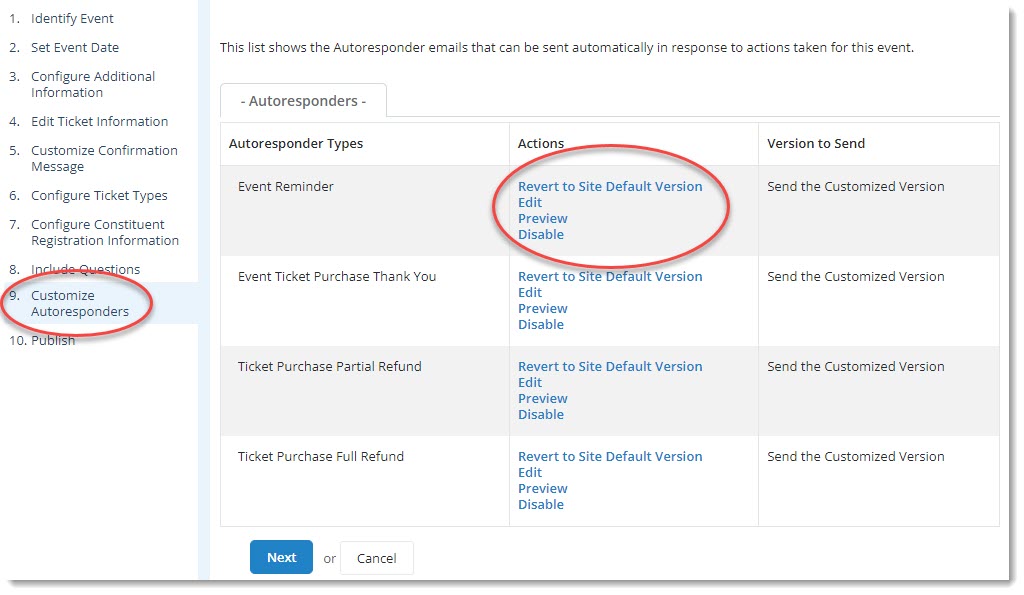
Customize autoresponders
If desired, customize the emails automatically sent to registered constituents. The messages include event reminders, thank you notes, and refund notifications. You may Edit, Preview, or Disable autoresponders. You may also Revert to Site Default Version after making changes.
Publish
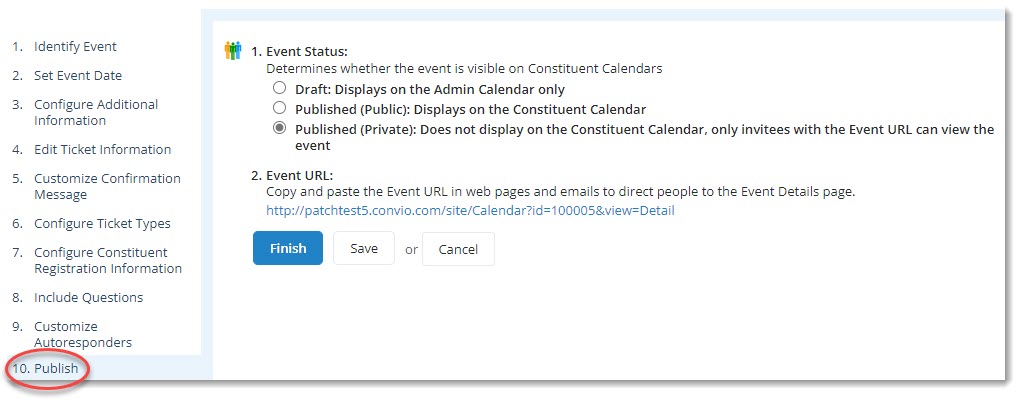
Select if the event will be visible on calendars for everyone, only specific invitees, or only administrators.
A URL for the Event Details page is provided. The link can be copied and pasted into communications to share the event details.
For the purposes of this walkthrough:
-
Select Published (Private): Does not display on the Constituent Calendar, only invitees with the Event URL can view the event.
-
Copy the URL.
-
Select Finish.
-
Open a new browser tab, paste and go to the URL.
